Maximum Flavor: Recipes That Will Change the Way You Cook (15 page)
Read Maximum Flavor: Recipes That Will Change the Way You Cook Online
Authors: Aki Kamozawa,H. Alexander Talbot
Tags: #Cooking, #Reference, #Courses & Dishes, #General, #Methods


FERMENTATION
Fermentation is a process of transformation, and it is making a big comeback. It seems like everyone—at home and in restaurants—is making cheese and vinegar and brewing up a storm. Home fermentation is economical and delicious. It allows you to take advantage of seasonal abundance, adds nutritional value to many foods, and makes them more digestible. Most important, fermentation adds flavor and makes food and drinks more delicious.
Beginners are often intimidated by the idea of fermentation. They don’t realize that the open bottle of wine slowly turning to vinegar on the counter and that jar of sauerkraut in the fridge are examples of fermentation already occurring in their kitchen. Coffee beans and cacao beans are fermented before they are roasted. Miso, soy sauce, and salumi are all slowly fermented products with complex and haunting flavors. Sparkling kombucha and tangy kefir are popping up next to sodas in beverage coolers. In fact, from single-barrel bourbon to sparkling wine, fermented beverages make for festive occasions all around the world.
Fermentation is, generally speaking, the process by which carbohydrates are broken down by microorganisms and enzymes. The easiest way to facilitate this is to create a hospitable environment for positive microorganisms and let them go to work. In culinary terms it’s easier to think of it as a process by which the sugars in food are broken down into acids or alcohols. This is an oversimplification, but it helps open your mind to the possibilities in your kitchen.
Sourdough starter is a great illustration of how two ingredients can transform into something very different from their original form. It is made by stirring together flour and water and then leaving them out at room temperature for a couple of days to ferment. We like to start small with ½ cup (113 grams) water and 4 ounces (113 grams) all-purpose flour. Stir them together and leave out at room temperature until the mixture starts to bubble and ferment. Once this happens, discard half and add another ½ cup (113 grams) water and 4 ounces (113 grams) flour. Repeat this process for three to four days, until the starter becomes very active and has a clean sour smell. Healthy sourdough starter looks alive; it seems to breathe, forming bubbles and moving around in its container. Once this happens it’s ready to go. For a gluten-free starter, we use a fifty-fifty blend, by weight, of sorghum flour (sometimes called “sweet sorghum flour”) and whole ground flaxseed meal instead of all-purpose flour; the process is the same.
If you feed your starter daily you will always have some on hand for baking. You can easily increase the batch by adding larger quantities of flour and water the day before you need to use it. On the other hand, if you want to take a break from baking, you can put it in the refrigerator to slow things down and simply feed it every other day (or discard the starter and start fresh when you’re ready to begin again).
SCoBY (Symbiotic Colony of Bacteria and Yeast)—such as Kombucha mushrooms, kefir grains, and vinegar mothers—are easily purchased online and are used to ferment natural vinegars, sparkling beverages, and yogurts. These are live cultures that can be used to create fermented products at home. You can also buy dried cultures for lactic fermentation and cheesemaking from various sources online. Your favorite store-bought yogurt or buttermilk can be used to culture a new batch at home, which then can be used ad infinitum. Cultured whey, a by-product of homemade cultured butter and cheesemaking, can be used to kick-start your next batch of
pickles
.
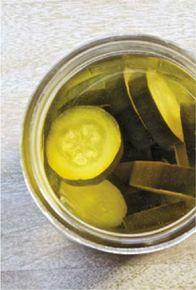
Pickling was originally developed as a method of preserving the harvest through the winter. Nowadays shorter fermentation times can be used to preserve the fresh flavor and texture of ingredients as long as you keep in mind that the finished pickles will not keep as long as fully fermented versions. Today’s quick pickles can focus on taste. We find that just a little lactic fermentation produces something quite delicious.
Most pickles are made by putting fruits and vegetables in a flavored brine and letting them ferment at room temperature. The salt works to keep away the bad bacteria and microorganisms until the lactobacillus bacteria can get going. Anywhere from 3% to 5% salt as the base of your brine will work nicely. A little whey in the brine will help get things going even faster. Here’s the trick for pickling: Your ingredients
must stay submerged
in the brine. People sell pickle weights for this purpose, but you can also use a small ceramic disk or a crumpled ball of plastic wrap wedged under the lid of your container. As long as you have at least a 3% salt solution and your pickles are not exposed to the air in any way, your fermentation should never go awry.
Once the lactic fermentation has taken hold, the acid and alcohol that they produce take up the defense. A healthy fermentation has clear liquids and a clean sour smell. Fermentations can go bad, and it’s usually quite clear when that’s happened. Mold appears on the surface of your ingredients or they get slimy or malodorous. Trust your instincts; if it looks or smells off—and this goes for any type of fermentation—then add it to the compost pile. While these cases are rare and are usually caused by improper storage or failing to completely cover your ingredients with brine, it does happen occasionally and the best thing to do is start over.
A little bit of carbonation is a natural by-product of the process and shouldn’t cause alarm. The fermentation process slows down dramatically in the refrigerator but doesn’t stop completely. If pickles are left to ferment a little too long, they sometimes become carbonated. Biting into a fizzy pickle is an odd sensation. If you don’t like the effect, the easiest way to alleviate it is to slice or chop the vegetables and let them rest for a few hours before eating them. The CO
2
evaporates out and no one will ever know it was there in the first place.

GRILLED ARTICHOKES
WITH BROWN BUTTER MAYONNAISE
THE HEART OF THE ARTICHOKE IS ONE OF THOSE SPECIAL
ingredients that people go gaga for. When cooked properly it is surprisingly tender and silky, with a delicate, earthy flavor that makes everything else taste sweeter. We think of the heart as the pot of gold at the end of the rainbow, only reached after eating your way through layers of leaves, scraping the tender flesh from the spiky exterior with the edges of your teeth. Many people shy away from cooking artichokes at home because they think they are a lot of work to prepare. This recipe makes them easy, and the smoky flavor of the grill adds a whole new dimension to their natural sweetness. Artichokes generally appear in the springtime and are available throughout the summer. You can tell if an artichoke is fresh if it feels heavy in your hand and the leaves squeak slightly when you squeeze them together.
We figured out a handy way to make a cooked mayonnaise in the microwave. It is a little more shelf-stable than uncooked mayonnaise, and you don’t have to stress if you don’t have super-fresh organic eggs on hand. Since artichokes are usually served with either mayonnaise or melted butter, it made sense to bring the two things together into one satisfying dish.
SERVES 8 AS A SIDE DISH OR STARTER
ARTICHOKES
4 large
artichokes
2 tablespoons 28 grams
olive oil
1 teaspoon 6 grams
fine sea salt
16
garlic
cloves, peeled
BROWN BUTTER MAYONNAISE
8 tablespoons 113 grams
unsalted butter,
melted
½ cup 113 grams
extra-virgin olive oil
¼ cup 56 grams
fresh lemon juice
(from 2 lemons)
2 large
eggs
2 large
egg yolks
½ teaspoon 3 grams
fine sea salt
1
⁄
16
teaspoon 0.125 gram
cayenne pepper
3 tablespoons 16 grams
Toasted Milk Solids
2
lemons,
quartered and seeded
Maldon sea salt
GRILL THE ARTICHOKES:
Preheat a grill to medium-high heat (400°F/205°C).
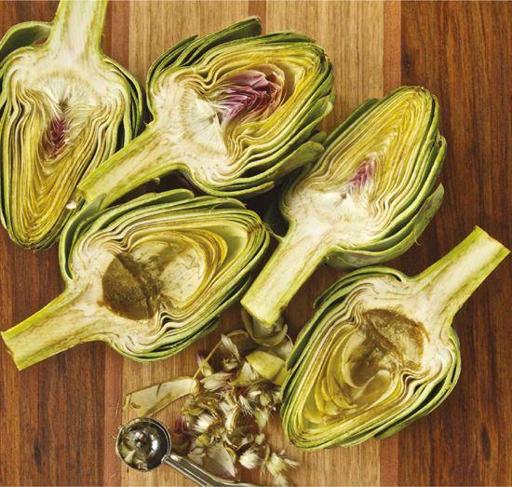
Halve the artichokes lengthwise. Use a spoon, melon baller, or small ice cream scoop to remove and discard the choke. Put the artichoke halves in a large bowl with the olive oil and salt, and toss to coat evenly. Lay a piece of parchment down on a cutting board. Lay 2 artichoke halves, cut sides down, on the parchment. Tuck 2 cloves of garlic underneath each artichoke half in the hollow where the choke used to be. Wrap the parchment around the artichokes and then put the package on a large sheet of foil. Wrap the foil securely around the parchment-wrapped artichoke. Repeat with the remaining artichokes. Put the artichoke packages on the grill, close the lid, and cook for 30 minutes. Remove the packages from the grill and let them rest for 5 minutes.
MAKE THE MAYONNAISE:
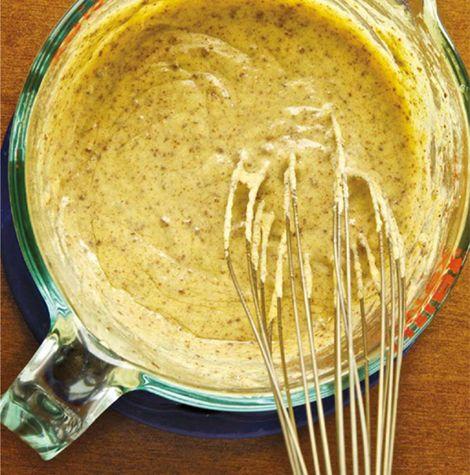
In a small bowl, stir together the butter and extra-virgin olive oil; set aside. In a large microwave-safe bowl, whisk together the lemon juice, whole eggs, egg yolks, salt, and cayenne. Whisk in the butter–olive oil mixture until combined. Microwave on high for 1 minute. Remove the bowl from the microwave and whisk the mixture. It will have just started to thicken on the edges of the bowl but will quickly thin out as you whisk it. Microwave on high for 1 minute more. Remove the bowl from the microwave and whisk the mixture; it should be thick and smooth. Strain the mayonnaise through a fine-mesh sieve and whisk in the toasted milk solids. The warm mayonnaise may be used immediately (it’s good hot or cold). Once cooled, the mayonnaise may be stored in a covered container in the refrigerator for up to 1 week.
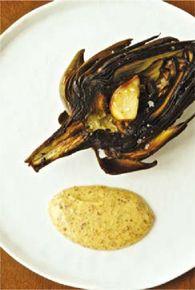
To serve, cut the artichoke packages open and put an artichoke half on each plate, cut side up. Spoon the garlic pieces back into the cavity where the choke was. Squeeze a lemon quarter over each artichoke and sprinkle with Maldon sea salt. Serve the brown butter mayonnaise on the side for dipping.

