The Complete Beginners Guide to Mac OS X El Capitan (11 page)
Read The Complete Beginners Guide to Mac OS X El Capitan Online
Authors: Scott La Counte

Notes, like most of the apps in El Capitan, syncs to your iPhone and iPad as long as you are logged into the same iCloud account.

Creating and Editing Notes
- There are a few different ways to create a brand new note. You can start a new note by clicking on the Compose icon (the square with a pencil going through it), or double clicking an empty space in the left sidebar. You can also right-click the left sidebar and select New Note.
- Once the note is created, the line will begin blinking in the right window, indicating that it’s time for you to get writing.
- The notes will automatically save as you type, so exiting Notes won’t mean you lose progress.
- If you need to pick up where you left off on a note, you can use the search bar to find the exact note you are looking for, or scroll through the left sidebar and select the appropriate note. With the note highlighted, click anywhere in the right window to begin editing that note, or double-click to open up a smaller window.
- To remove notes, find the one you’d like to delete and highlight it. Press the Delete key and confirm it. You can also right-click a note and select Delete.
Notes can be shared through different outlets like LinkedIn, Facebook, Mail, and Messages. If you’d like to share a note, click on the Share button in the top right corner and select how you’d like to send it.
iTunes
You probably know what iTunes is; you might even use it. On a Mac it’s really not that different from a Windows computer; the main difference is that on a Windows computer music is played through the Windows Media Player by default and on a Mac, it’s played on iTunes.
Keep in mind that you should use the same iTunes account on your Mac that you use on other devices because the media you buy on iTunes will show up on all of your devices. The exception is rentals—rentals are only available on the device you buy it from. So if you rent something on your Mac, don’t expect to be able to watch it on your Apple TV or iPad; this is a studio licensing issue, not an Apple one. You do, however, have the option of using AirPlay for rentals to send it to your Apple TV.
Adding Music to your Library
This section is for adding music you already own and have on the computer. If you don’t have any music, you should probably skip ahead to the iTunes Store section first.
- At the top menu bar, click File > Add to Library.
- When the window comes up, use the left bars to search for the specific song or songs that you’d like to add.
- If you already have a giant music collection that you may have carried over from an old computer, you can import entire folders all at once.
- When you’ve decided what to add, click on it once to highlight it, and select the blue Open button.
- It may take some time depending on how many songs you are importing, but iTunes will show you the progress.
- Once complete, click on the My Music tab again to verify that your music has been added to the iTunes collection.
Playlists
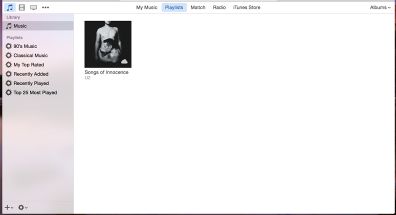
The Playlists section is where you can view, edit and delete playlists you may have created. On the left hand side you will notice that Apple has created some for you: 90’s Music, Classical Music, My Top Rated, Recently Added, Recently Played, and Top 25 Most Played. These are pretty self-explanatory, and Apple uses a song’s built-in metadata to determine which songs will fit in those premade playlists.
At the top of the list you will also see one called Genius. Selecting Genius will allow you to use Apple’s specially made music mixer. It takes songs from your music collection and creates great-sounding custom playlists and mixes.
Using Genius
If this is the first time you are using Genius, you will have to first click on the button that says Turn On Genius.
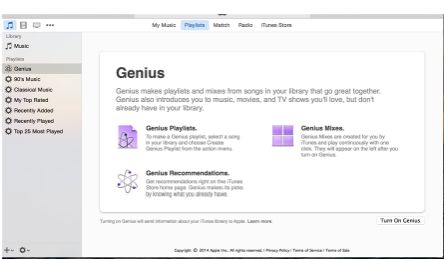
Once you turn it on, there will be three steps that happen automatically. Depending on the size of your library, this may take awhile so grab a snack. Once it’s finished, your computer screen will greet you with a message that says Genius has been successfully turned on.
Match
iTunes Match is great if you have a large music library but don’t have enough storage on your phone. Signing up for Match will allow you to store your entire collection on iCloud, including music that you’ve ripped from CDs and didn’t purchase through iTunes. This way you’ll be able to stream your entire library from any Apple device connected to iCloud without taking up any storage.
The songs are “matched” by Apple’s online music database, so when you are playing the song on your iPhone, for example, it isn’t actually the same file that you uploaded or purchased. Rather, it’s Apple’s version of the song in full 256 Kbps, even if the song you originally uploaded or purchased was of lower audio quality. If the song is not found on Apple’s own servers (your cousin’s Whitesnake cover band perhaps), it will playback the original file you uploaded, with the original audio quality.
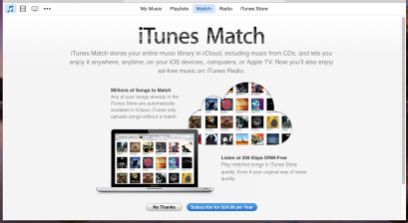
Unfortunately, iTunes Match isn’t free. If you’d like to sign up for it, expect to pay $24.99 for a yearly subscription. Signing up for Match does have another perk though – if you enjoy using iTunes Radio but can’t stand the ads, purchasing the yearly Match subscription will remove ads from Radio.
Radio
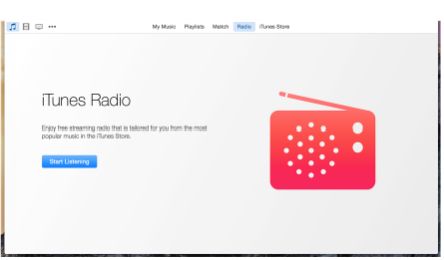
Radio is a free music streaming service by the music lovers at Apple. Based on several different factors, Apple creates radio stations that you will probably enjoy. As you listen to different things, the stations will become more and more personalized, playing songs that are more in line with what you’ve been recently listening to and avoiding the ones you haven’t played.
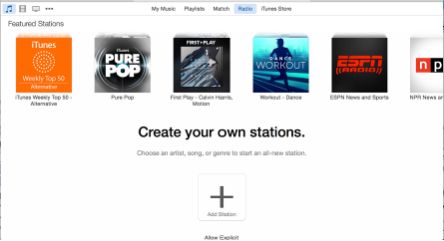
If you would like to explore the radio a little more, you can browse through artist-curated playlists created with a specific goal in mind, or just search by genre. You may also find First Plays, which allows you to listen to entire albums before buying them. This feature only works on select albums, however, so don’t expect to find every album available for First Play.
Creating a Radio Station
- To play a new radio station, open up iTunes and click on the Radio tab.
- If this is the first time you’ve used Radio, you will have to click on the blue button that says Start Listening.
- When Radio fully loads, you will notice that the top half of the window is filled with premade radio stations like Smooth Jazz, Classic Rock, iTunes Weekly Top 50 Dance, or Pepsi Pulse Pop if you like listening to bubbly pop backed by a giant soda company. Clicking on one will automatically start playing that radio station. At the bottom of the screen you can also toggle explicit language on or off.
- If these stations just aren’t cutting it, you can create your own by clicking the gigantic + button that says Add Station.
- You can choose a genre as a starting point; or, if you’d like to be more specific, use the Search bar to enter the name of an artist, song, or genre that you’d like to listen to. The results will be similar music to what you originally searched for.
- The station will begin playing and you can see the track information at the top of iTunes, but the main difference with Radio is that since you don’t already own the music, you’ll be able to see how much it would cost to buy the song currently playing.
iTunes Store
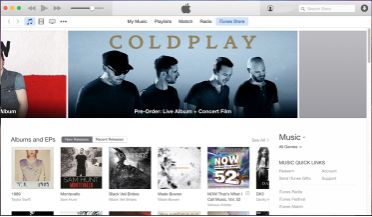
If you don’t own any music yet and are looking to build a digital song collection, or if you own music but would like to add new tracks, the iTunes store is where you can browse, purchase and download new music. In addition to music you can also buy movies, TV shows, podcasts, audiobooks, and books.
