5/3/1: The Simplest and Most Effective Training System for Raw Strength (2nd Edition) (2 page)
Read 5/3/1: The Simplest and Most Effective Training System for Raw Strength (2nd Edition) Online
Authors: Jim Wendler

Day 1
Day 2
Day 3
Day 4
Warm-up
Warm-up
Warm-up
Warm-up
Standing Military
Deadlift
Bench Press
Squat
Press
Assistance Exercises
Assistance Exercises
Assistance Exercises
Assistance Exercises
Possible Training Days:
Monday/Tuesday/Thursday/Friday
Sunday/Monday/Wednesday/Friday
Sunday/Monday/Wednesday/Thursday
You can train on any days you’d like, obviously, and there are many possibilities. Just be sure to give yourself appropriate rest between training days. If you don’t know what “appropriate rest”
is, ask yourself this question:
Did I get enough rest after my last session to have an optimal training session today?

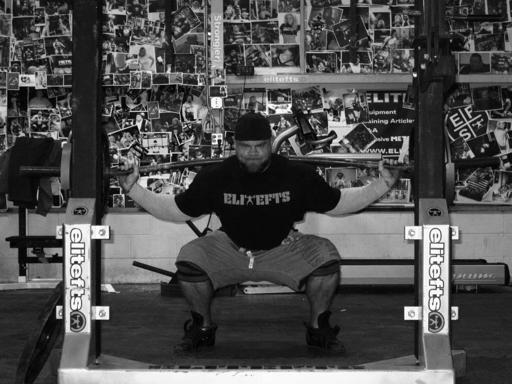
The Squat
We’ve heard the refrain a thousand times before that the squat is the “King of Al Exercises.”
This gets redundant after a while, but there are myriad reasons why it’s stayed on top for so long. The squat really does reign supreme. With that said, here are some helpful hints on squatting:
Your eyes should be focused. Some people believe you should look straight up when you squat. These people aren’t good to listen to. Your eyes should be directed straight ahead or just slightly downward. Don’t take your eyes off the point you choose. Pick something, and stare at it intently. Even if there’s movement and distractions around this point, they shouldn’t stop your stare. This is how focused you have to be.
Proper bar placement depends on your body type and what’s most comfortable to you.
Some people have shoulder problems and can’t carry the bar very low. Others just plain suck at high bar squatting. Place the bar where it allows you to reach depth with good form. It’s just that easy.
I like taking a ful grip on the bar, but I used a “thumbs-around” grip for the first half of my squatting life. I don’t see this as a deal-breaker.
Keep your elbows down and try to force them under the bar. This will cause your hips to drive first out of the bottom of the squat. It’l also keep your chest high and prevent you from squatting with your legs first instead of your back. The first thing to shoot up with many people is their ass. Remedy this by pushing with your hips and keeping your elbows under the bar – or at least trying to.
Descend until the tops of your thighs are parallel to the ground. Go deeper if you’d like, but this is the minimum depth you should shoot for.
When you begin your descent, push your knees out to the sides and your glutes back.
Arch your upper back hard for the entire lift. This will cause your lower back to arch, too.
Grip the bar with the narrowest grip you can manage without hurting your shoulders.
This will ensure that you remain tight throughout the lift.
Once you hit parallel, drive your elbows under the bar and explode up.
Before you take the bar out of the rack, fill your diaphragm with air, place the bar on your back, then confidently push it out of the rack with your back and legs. Don’t “wimp” the bar out. I like to do this with a large breath, which I won’t let out until I’m in my stance.
Any more than two or three steps back is a waste of time and energy. Be efficient. I mental y count, “One, Two” when taking the bar out to make sure that I take only two steps out of the rack.
Squeeze the bar hard during the lift. This will keep your entire body tight.
Before the descent, take another breath and go. Keep this air in until you’re about 2/3 of the way back up. Then you can let it out. I’ve taught myself to hold my breath for 3 reps, but this is very difficult and I wouldn’t recommend it for everyone.
Bouncing out of the bottom position (the “hole”) is not a bad thing. Losing your air and tightness when you do so is. Don’t do that.
Your descent should be slow enough to permit you to maintain good form, but it should be fast enough to not waste energy or kill the stretch reflex at the bottom. Many lifters wil “dive bomb” their squats. This is a fancy term for dropping very quickly and almost catching the bar in the bottom position before squatting back up. This is okay for advanced lifters who know their bodies and have great technique, but it’s probably unacceptable for about 99% of the rest of the population.
Your toes should be pointed out at about a 30-45 degree angle. This will allow your knees to track correctly.
The Press
Most lifters like taking a grip just outside the shoulders. I grip about an inch and a half outside the knurling of a power bar – which puts my grip about thumb’s length from the smooth part of the bar. This will ensure shoulder safety and stability.
I always use a false grip where my thumbs aren’t wrapped around the bar. This is personal preference, but it seems like the bar path tracks better overhead when I do this.
This grip can be dangerous, however, so use caution.
I begin the press by lifting my chin up, and I try to just miss it when the bar goes up. I don’t want the bar bowing out any more than it has to.
As the bar is pressed overhead, bring your head and chest through. Don’t push the bar back.
Bring the bar back down in the same motion.
Each rep should start with the bar on your shoulders. Don’t perform half reps. Your body was designed to move through a full range of motion, so do it.

Keep your lower back arched and your chest up throughout the entire lift.
The positioning of your feet is determined by your comfort level. I take a narrow (less than shoulder width) stance, but this isn’t a requirement.
You don’t use leg drive to push the bar overhead, but try to keep your legs strong and taut through the entire movement.
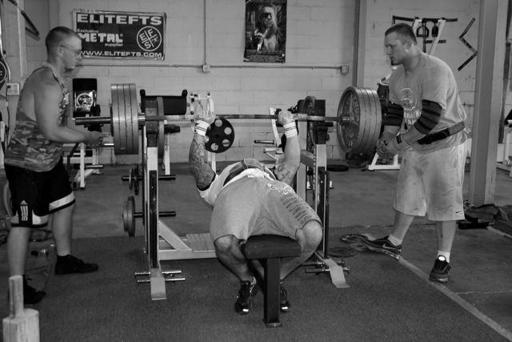
The Bench Press
Your shoulder blades must be pushed back, and your chest must be spread throughout the bench press. If you’re benching without the aid of a bench shirt, most of the bar weight (and your bodyweight) should be supported by your upper back. This will help keep the bar from touching too low. It wil ensure that you don’t lose your tightness, and that you’ll be pressing from a strong bottom position.
Your lower back should be arched and kept that way. This does
not
mean you lift your butt off the bench.
Again, do NOT lift your butt off the bench. This bears repeating.
Foot placement is up to you, but make sure they’re in a solid and strong position. I like to place my feet back slightly toward the head of the bench, and I assume a stance that’s narrow enough to allow my legs to squeeze the bench. As I press up, I drive my heels into the ground and squeeze my legs, picturing all the energy from my legs and hips driving into the bar. This is “leg drive.” Think about squatting the weight up.
Grip width is also up to you. Over the years, I’ve found that a narrow grip is a little healthier in the long run than a wider grip. My grip is around 18” between index fingers.
This may limit my weights in the short term, but it’l ensure that I won’t have any pec or shoulder problems in the long run. It’s better to press today
and
tomorrow than just to press today.
As soon as the bar is in your hands, make sure your lower and upper back are arched, your feet are firmly on the floor, and your hands are wrapped tightly around the bar.
I like to take a large breath and force it into my diaphragm before lifting the bar off. This helps me feel stronger and more stable when I get the bar. A strong and easy lift-off is a great way to improve your lift and your mental state. Again, don’t “wimp” the bar off the rack.
Don’t use a lift-off partner when you train. Use this only for maximal attempts.
I usually hold my breath for the first 2-3 reps of every set. This is hard to do, but it ensures good technique and you won’t lose tightness.
If you’re using a closer grip like I do, the bar wil touch higher on the body than it wil with a wider grip – usually hitting just below my nipples. If you use a wider grip, the bar will hit slightly lower.
Because you’l be hitting higher on the chest with a closer grip, the bar wil travel only slightly back toward your face. This is because you’ve already started the press closer to your head than you would have with a wider grip.

With a wider grip, this path wil be more pronounced because you’re hitting your chest lower. This wil trace a “C” motion.
Keep your elbows tucked on the way down. This doesn’t mean they should be tucked into your sides. A slight tuck wil suffice. If you tuck too hard, you’l lose power off the bottom of the lift. This is where most people get stuck.
Once you touch your chest, keep your elbows tucked and drive the bar back slightly.
About halfway up, allow your elbows to flare out, and keep pushing up and back.
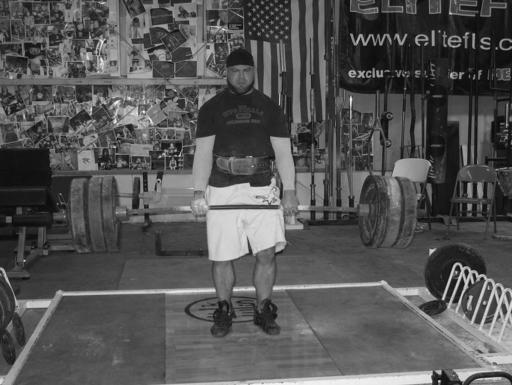
The Deadlift
To figure out the best stance for your deadlift, pretend you’re about to perform a vertical jump. Get your feet and body into position. Now, look down and move your feet in slightly. This is your starting position. This varies from lifter to lifter, but I’ve found this to be an optimal starting point.
Your toes should be pointed slightly outward.
Don’t deadlift with your weight on the bal s of your feet. This is an injury waiting to happen. Your weight should be on the middle of your foot or toward the rear.
Start with the bar just in front of your shins, but not touching them. Once you reach down and grab the bar, your shins will meet it.
Your upper back should be pulled together with your shoulders over the bar.
Your lower back should be arched or held static in whatever position you’re in. I don’t deadlift with a perfectly arched back, but it’s not rounded either, and it won’t round during the lift.
Your hands should be placed just outside your feet – wide enough to allow you to get your hips through at the top of the lift. You’l have to experiment with this.
Most people deadlift with a mixed grip. One hand is supinated (like you’re doing curls), and the other is pronated (palm facing toward you). Using a double overhand grip (both hands pronated) is fine, but using straps is not. Choosing which hand to supinate is a matter of personal preference.
Before lifting the bar, fill your diaphragm (not your chest) with air.
Begin the ascent by easing pressure into the bar.
Do not jerk the bar off the ground
. This is how you tear a bicep or hurt your back. The best way to do this is to squeeze the bar hard with your hands and squeeze your butt.
I try to keep my eyes focused on a point on the ground about 15 feet in front of me.
Before the bar is lifted, I always think, “Butt down, chest up.”
The first movement of the deadlift should be initiated with the legs, not the back. This is why it’s imperative to have strong quads to deadlift.
Once the bar begins moving up your shins, start pul ing back and onto your heels. Don’t let the bar come out in front of you. Keep it close to your body at all times. It should touch your thighs on the way up.