Pro Oracle Database 11g Administration (11 page)

SQL> shutdown immediate;
Next, apply the patch. Ensure that you perform this step as the owner of the Oracle software (usually the oracle operating system account). Also make sure your ORACLE_HOME variable is set to point to the Oracle home to which you’re applying the patch. In this example, because the opatch utility isn’t in a path included in the PATH directory, you specify the entire path:
$ $ORACLE_HOME/OPatch/opatch apply
Finally, verify that the patch was applied by listing the inventory of patches: $ $ORACLE_HOME/OPatch/opatch lsinventory
Here is some sample output for this example:
Interim patches (1) :
Patch 7695070 : applied on Fri Apr 09 16:09:38 MDT 2010
Created on 24 Jun 2009, 02:32:42 hrs US/Pacific
Bugs fixed:
7695070
■
Tip
For more information regarding the opatch utility, refer to MOS note 242993.1.
Installing Remotely with the Graphical Installer
In today’s global environment, DBAs often find themselves tasked with installing Oracle software on remote Linux/Unix servers. In these situations, I strongly suggest that you use the silent installation mode with a response file (as mentioned earlier in this chapter). However, if you want to install Oracle on a remote server via the graphical installer, this section of the chapter describes the required steps.
■
Note
If you’re in a Windows-based environment, use the Remote Desktop Connection or VNC to install software remotely.
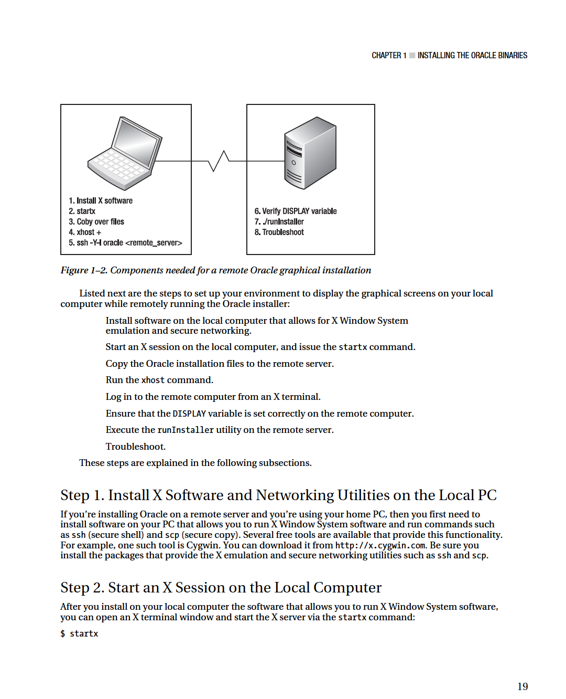
One issue that arises is how to run the Oracle installer on a remote server and have the graphical output displayed to your local computer. Figure 1–2 shows the basic components and utilities required to remotely run the Oracle graphical installer.
18


CHAPTER 1 ■ INSTALLING THE ORACLE BINARIES
Here is a snippet of the output:
xauth: creating new authority file /home/test/.serverauth.3012
waiting for X server to begin accepting connections .
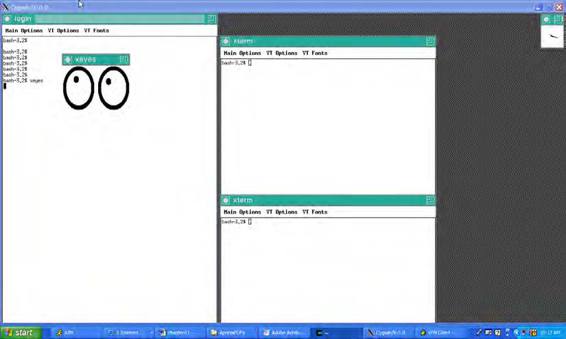
When the X software has started, run a utility such as xeyes to determine whether X is working properly:
$ xeyes
Figure 1–3 shows what a local terminal session looks like using the Cygwin X terminal session tool.
Figure 1–3.
Running xeyes utility on local computer
If you can’t get a utility such as xeyes to execute, stop at this step until you get it working. You must have correctly functioning X software before you can remotely install Oracle using the graphical installer.
Step 3. Copy the Oracle Installation Media to the Remote Server
From the X terminal, run the scp command to copy the Oracle installation media to the remote server.
Here is the basic syntax for using scp:
$ scp
$ scp linux_11gR2_database_1of2.zip oracle@shrek2:.
20
CHAPTER 1 ■ INSTALLING THE ORACLE BINARIES
Step 4. Run the xhost Command
From the X screen, enable access to the remote host via the xhost command. This command must be run from your local computer:
$ xhost +
access control disabled, clients can connect from any host.
The prior command allows any client to connect to the local X server. If you want to enable remote access specifically for the remote computer on which you’re installing the software, provide an IP
address or hostname (of the remote server). In this example, the remote hostname is tst-z1.central.sun.com:
$ xhost +tst-z1.central.sun.com
tst-z1.central.sun.com being added to access control list
Step 5. Log In to the Remote Computer from X
From your local X terminal, use the ssh utility to log on to the remote server on which you want to install the Oracle software:
$ ssh -Y -l oracle
Step 6. Ensure that the DISPLAY Variable Is Set Correctly on the
Remote Computer
When you’ve logged on to the remote box, verify that your DISPLAY variable has been set: $ echo $DISPLAY
You should see something similar to this:
localhost:10.0
If your DISPLAY variable isn’t set, you must ensure that it’s set to a value that reflects your local home computer location. From your local home computer, you can use the ping or arp utility to determine the IP address that identifies your local computer. Run the following command on your home computer: C:\> ping
■
Tip
If you don’t know your local home computer name, on Windows you can look in the Control Panel, in the System window, on the Computer Name tab.
Now, from the remote server, execute the following command to set the DISPLAY variable to contain the IP address of the local computer:
$ export DISPLAY=129.151.31.147:0.0
Note that you must append the :0.0 to the end of the IP address. If you’re using the C shell, use the setenv command to set the DISPLAY variable:
21

CHAPTER 1 ■ INSTALLING THE ORACLE BINARIES
$ setenv DISPLAY 129.151.31.147:0.0
If you’re unsure which shell you’re using, use the echo command to display the SHELL variable: $ echo $SHELL
Step 7. Execute the runInstaller Utility
Navigate to the directory where you copied and unzipped the Oracle software on the remote server.
Locate the runInstaller utility, and run it as shown:
$ ./runInstaller
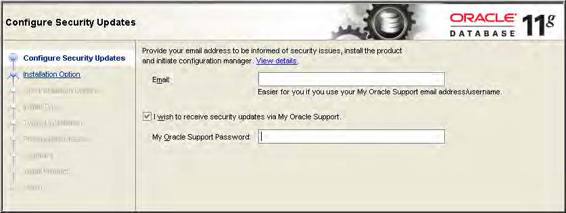
If everything goes well, you should see a screen like the one in Figure 1–4.
Figure 1–4.
Oracle Universal Installer 11g welcome screen
From here, you can point and click your way through an Oracle installation of the software. Many DBAs are more comfortable installing the software through a graphical screen. This is a particularly good method if you aren’t familiar with Oracle’s installation process and want to be prompted for input and be presented with reasonable default values.
Step 8. Troubleshoot
Most issues with remote installations occur in steps 4, 5, and 6. Make sure you’ve properly enabled remote-client access to your local X server (running on your home computer) via the xhost command.
The xhost command must be run on the local computer where you want the graphical display presented. Using the + (plus sign) with the remote hostname adds a host to the local access list. This enables the remote server to display an X window on the local host. If you type the xhost command by itself (with no parameters), it displays all remote hosts that can display X sessions on the local computer: $ xhost
access control disabled, clients can connect from any host
Setting the DISPLAY operating system variable on the remote server is also crucial. This allows you to remotely log in to another host and display an X application back to your local computer. The DISPLAY
22
CHAPTER 1 ■ INSTALLING THE ORACLE BINARIES
variable must be set on the remote database server, and it must be set to contain information that points it to the local computer on which you want the graphical screen displayed.
Summary
This chapter detailed techniques for efficiently installing the Oracle binaries. These methods are especially useful if you work in environments where you are geographically separated from the database servers. The Oracle silent installation method is efficient because it doesn't require graphical software and uses a response file that helps enforce consistency from one installation to the next. When working in chaotic and constantly changing environments you should benefit from the installation tips and procedures described here.
Many DBAs feel more comfortable using Oracle's graphical installer for installing the database software. However, using the graphical installer can be troublesome where the server is in a remote location or embedded deeply within a secure network. A slow network or a security feature can greatly impede the graphical installation process. In this situations make sure you correctly configure the required X software and operating system variables (such as DISPLAY).
It's critical as a DBA to be an expert with Oracle installation procedures. If the Oracle installation software isn't correctly installed you won't be able to successfully create a database. Once you have properly installed Oracle, you can go on to the next step of starting the background processes and creating a database. The topics of starting Oracle and issuing a creating a database are discussed next in Chapter 2.
23

CHAPTER 2 ■ IMPLEMENTING A DATABASE
A Manually Intensive Approach
In Linux/Unix, when you’re using the Bourne, Bash, or Korn shell, you can set operating system variables manually from the operating system command line using the export command: $ export ORACLE_HOME=/ora01/app/oracle/product/11.2.0/db_1
$ export ORACLE_SID=O11R2
$ export LD_LIBRARY_PATH=/usr/lib:$ORACLE_HOME/lib
$ export PATH=$ORACLE_HOME/bin:$PATH
For the C or tcsh shell, use the setenv command to set variables:
$ setenv ORACLE_HOME
$ setenv ORACLE_SID
$ setenv LD_LIBRARY_PATH
$ setenv PATH
Another way that DBAs set these variables is by placing the previous export or setenv commands into a startup file such as .bash_profile, .bashrc, or .profile. That way, the variables are automatically set upon login.
However, manually setting OS variables (either from the command line or from a startup file) isn’t the optimal way of instantiating these variables. For example, if you have multiple databases with multiple Oracle homes on a box, manually setting these variables quickly becomes unwieldy and not very maintainable.
Oracle’s Approach to Setting OS Variables
A much better method for setting OS variables uses a script that uses a file that contains the names of all Oracle databases on a server and their associated Oracle homes. This approach is flexible and maintainable. For example, if a database’s Oracle home changes (for example, after an upgrade), you only have to modify one file on the server and not hunt down where the Oracle home variables may be hard-coded into scripts.