Windows 10 Revealed (6 page)
Read Windows 10 Revealed Online
Authors: Kinnary Jangla
Tags: #Computers, #Operating Systems, #Windows Desktop, #Hardware, #Personal Computers, #PCs

Pin and Unpin Tiles
“Pinning apps to Start” pins an app to the right side of the Start menu. That way you can access your apps very easily in both Tablet mode and Desktop mode. To pin an app to the Start menu as a tile, find the app in the Start menu, right-click it, and click
Pin to Start
. To unpin a tile from the Start menu, right-click the tile, and click
Unpin from Start
. I show you how to do both in the next section.
Pin to Start
Let’s start by pinning to Start.
1.
Navigate to your favorite app in the apps list (here I choose the Music app) and right-click, as seen in Figure
2-6
.
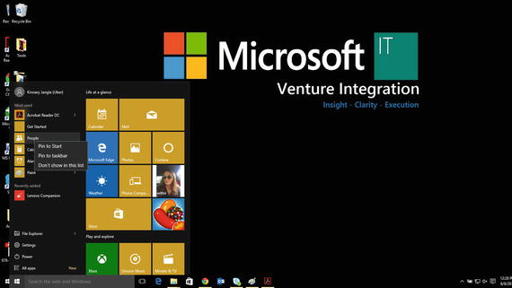
Figure 2-6.
Go to your favorite app and right-click on it
2.
Select the
Pin to Start
option, as seen in Figure
2-7
. The app gets pinned to the right side of the Start menu.
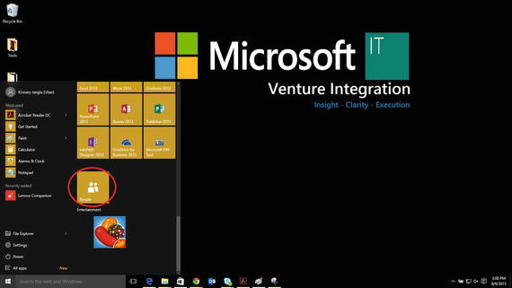
Figure 2-7.
Select the Pin to Start option. The People app is pinned to the right side of the Start menu
Unpin from Start
Here I show you how to unpin an app from the Start menu.
1.
To unpin the app from the Start menu, simply right-click on the pinned app.
2.
You will see the context menu. Select the
Unpin from Start
option, as seen in Figure
2-8
. The app will be unpinned from the Start menu.
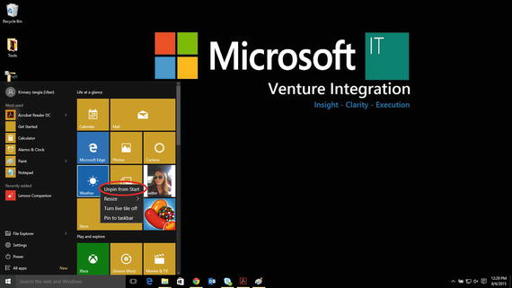
Figure 2-8.
Unpin app from the Start menu
Resize and Move Tiles
Like in Windows 8, Windows 10 lets you play around with your tiles. You can resize your tiles, move them around, and arrange them however you like. Depending upon the tile, you will be able to click it, hold it, and drag it around the Start menu. Now I will show you how to resize a tile.
1.
To resize a tile, right-click it and hover over
Resize
until the resize menu shows up, as seen in Figure
2-9
.
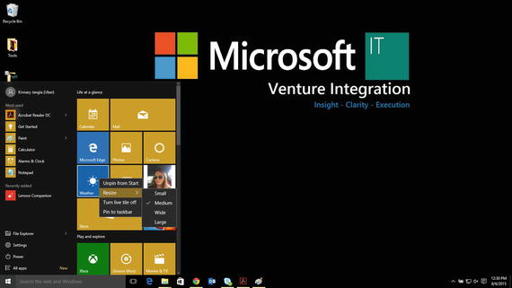
Figure 2-9.
Right-click the app and hover over the Resize menu
2.
Select one of the sizes—Small or Medium. The tile size changes, as seen in Figure
2-10
.
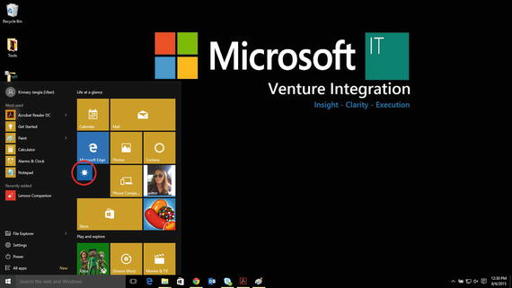
Figure 2-10.
The app size tile changes to wide
Edit the Tiles Section and Create New Categories
Like in Windows 8, in Windows 10, you can divide your live tiles into different categories. You can also edit the default categories and rename them whatever you want. I will now show you how to create a new category and how to edit an existing category.
Create a New Category
To create a new category, do the following:
1.
Click a tile, hold it, and drag it to the bottom of the Start menu until a black bar shows up, as seen in Figure
2-11
. Drop the tile below the black bar. Your tile will end up in its own little section.

Figure 2-11.
Hold and drag an app to the bottom of the Start menu. Drop the app below the new dull black bar that appears
2.
Click the area above the tile (where you saw the black bar). A white outline will appear, as seen in Figure
2-12
. Start typing in this box to name your category.
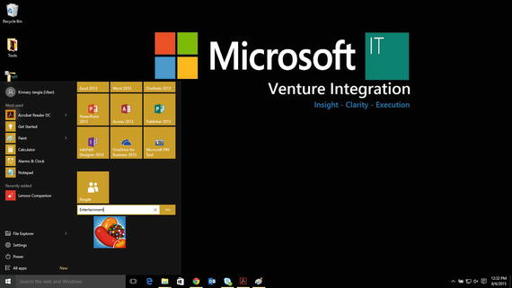
Figure 2-12.
Click the area above the app. A white line appears. Name the category. (I have named it Entertainment)
Edit an Existing Category
To rename a category, do the following:
1.
Click a category name to highlight it, as seen in Figure
2-13
.
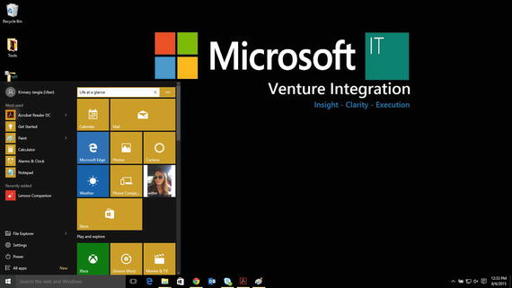
Figure 2-13.
Click the Life at a glance category name until a white text box appears
2.
Start typing to edit it, as seen in Figure
2-14
.
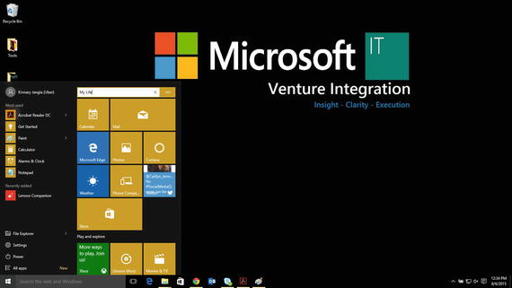
Figure 2-14.
Renaming Life at a glance to My Life
Most Recently Used Apps
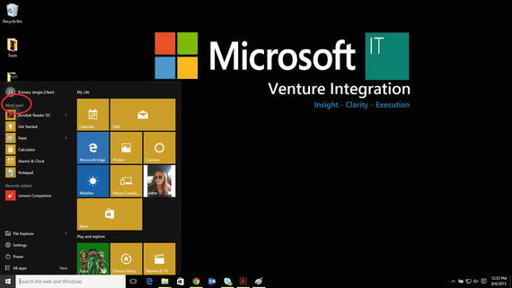
The most recently and frequently used apps are placed under the Most Used section on the left side of the Start menu (see Figure
2-15
). This list has all the apps that you use frequently.
