B003YL4KS0 EBOK (24 page)
Authors: Lorraine Massey,Michele Bender

Suggesting that you cut your own hair—or someone else’s—is a tricky subject if you’re not a trained hairdresser. But throughout the years, many curly girls have asked me to teach self-mane-tenance and I understand why. After all, horrible haircuts are probably the most traumatic experiences in a curly girl’s hair history. Myself included. At age sixteen, after going home in tears after yet another devastating haircut, I decided to take matters (and scissors) into my own hands. I felt like Scarlett O’Hara, when she shakes her fist and looks at the darkened sky, only I vowed, “As God is my witness, I will never let anyone else cut my hair again!” And I haven’t since that day. If you’re a curly girl, I know you can relate. We’ve all had the experience of sitting in the salon chair looking in the mirror, and with each snip, you see the haircut unfold as if you’re witnessing a car wreck in slow motion. And, you’re in it. Unfortunately, it can take months, even years, to recover from a cut where you end up completely shorn.
When it comes to cutting curly hair, I always say, “It’s not what you take off; it’s what you leave on.”
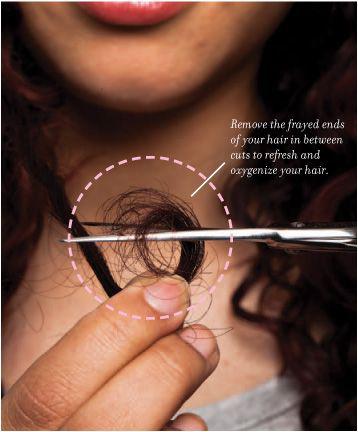
The sharpest point I want to make in this chapter is to teach you how to trim your own hair, or what I call “oxygenize” your curls yourself. You can do this in between your regular haircuts, to save time and money or simply out of “shear” frustration at the haircuts that you’ve gotten. “Oxygenize” means to refresh and aerate, so that the ends of the hair strands can breathe in more oxygen and moisture. I’m not talking about cutting big chunks of hair or reshaping it—that’s for your stylist. I’m talking about a fraction of an inch, half a C curl or, at most, a full C shape in your curl’s spiral in order to remove the frayed, knotty, granular ends of your hair. (See
page 94
for information on the C shapes of your curls.) With sharp, professional hair scissors, a small snip can go a long way for a curly do.
THE TUNNEL CUTBeware: There is a dreadful haircut that some stylists perform on thick, curly hair. It’s sometimes called a “tunnel cut,” but it has other aliases. They crop some curls at the roots and then leave a layer of longer hair over it, because they think this debulks the hair. But it actually makes the hair look bigger as the shorter pieces grow and push the longer, top layer outward. What a disaster! This was the last haircut I ever got many, many years ago. The aftermath looked like rats had gnarled on my hair!
I think of trimming the hair the same way you’d trim trees or plants in the garden. Your eyes would go to the end of a stem or branch and instinctively cut off the part that looked gnarly and dried out. By pruning the plant or tree, you’re helping it take in oxygen and water from the atmosphere. Almost immediately, it starts to look healthier and ready for new growth. Now, apply this same thinking to the ends of your hair, and you will be amazed at what a difference a little trim can and will make!
By now you know that curls are fragile and need to be cut with caution, and that cutting an inch off curly hair can look like you cut off three to four inches because
of the spring factor. You may want to start with a professional cut from your favorite curly stylist, and then later just trim a tiny amount of hair where needed to maintain the style. When you are at the salon, watch how your stylist cuts your hair when it is dry, and pick up some tips.
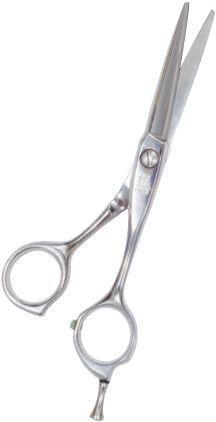
Before doing anything, it’s important to buy a pair of quality scissors that are made specifically for cutting hair. These usually cost upward of $100 at a beauty supply store or online. This may sound pricey, but believe me, it’s worth the investment. What you don’t want to use is a pair of thinning shears or a razor that will fray and split the ends of the hair. (If you have a trusted stylist, you can ask her what type of scissors she uses. My all-time favorite brand is Hikari.)
You also need a mirror, good lighting, and a neutral background so you can see the silhouette and shape of your hair. Lastly, you’ll need a hand mirror that’s big enough to help you see the back of your hair. Make sure that your hair has been cleansed and styled according to the Curly Girl Method for your curl type. This doesn’t have to happen immediately before you trim your hair. I like to cleanse my curls in the morning and then trim them before bed, because by then my hair is totally dry and my curls fall naturally.
A word of caution:
Never cut your
hair when it is wet. Never cut it while you’re in the dark, in a moving vehicle (trust me, people do this), or drinking alcohol. Also make sure you have plenty of time to cut your hair; when you’re rushed you’re more likely to make mistakes. And be careful: high-quality hairdressing shears are very sharp, so it’s easy to snip your fingers along with your hair.
SCISSORSThe right scissors are key to a great curly cut. If a superior cutting tool is used, the scissors melt through the hair in silence with precision and accuracy, and the haircut will grow out with no split ends. Scissors made for fabric or paper won’t give hair a precise cut. In fact, these and other inferior scissors can actually fray the ends because they tend to be duller than hairdressing scissors. Dull scissors will make a gnawing or grinding sound when you cut, and can require that you cut your curls a couple of times to get through the hair because they latch and pull.
Once you get a good pair of hair scissors, don’t use them for anything other than hair. Carefully wipe the scissors with a bit of olive oil and a chamois cloth after use. Store them safely between trims. (They’re very sharp, so don’t leave them around for children or pets to find.) A quality pair of shears will last a lifetime, and will stay sharp since they’re being used only on your hair (unlike those at a salon where they are used on thousands of heads of hair).
Quality hairdressing scissors are worth the investment.
Self-Mane-tenance (4:29)
First, stand in front of a mirror and look carefully at your hair’s overall shape and the ends of the hair, which you’re going to trim. Then, take a handheld mirror and turn so the back of your head is toward the wall mirror and you’re holding the hand mirror in front of you. Look at the way the hair looks and falls in the back of your head and look again at the ends that you’re going to trim.

Even though you are trimming only the very ends of the hair, it’s important that your scissors feel comfortable in your hands. A couple of cautions: Don’t open the blades too wide so the scissors look like a big X, because this may result in taking off bigger chunks of hair than desired. And don’t hold the scissors facing downward like a plane plunging nose first to the ground, as this will shred and fray the hair. Make a clean cut across the dry hair.
TO START . . .
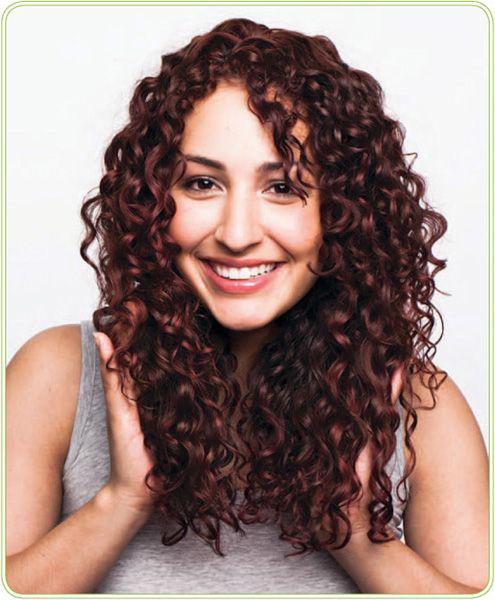
shake your curls by swaying your head back and forth. This allows them to naturally position themselves.
1
If your hair is shoulder length or longer, part the hair in the back and bring both sides forward in front of your shoulders as though you were going to make pigtails.

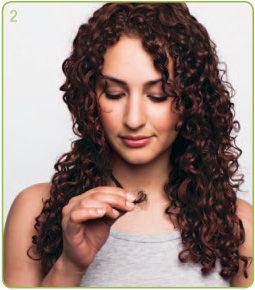
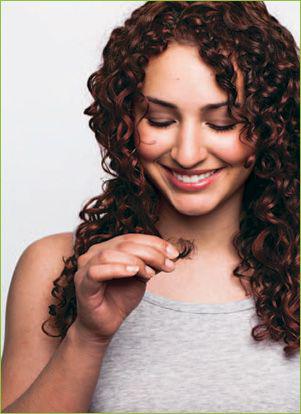
2
Look carefully at the ends to decide where you plan to trim.