iOS Programming: The Big Nerd Ranch Guide, 3/e (Big Nerd Ranch Guides) (8 page)
Read iOS Programming: The Big Nerd Ranch Guide, 3/e (Big Nerd Ranch Guides) Online
Authors: Aaron Hillegass,Joe Conway
Tags: #COM051370, #Big Nerd Ranch Guides, #iPhone / iPad Programming

Now that you’ve written your first iOS application and run it on the simulator, it’s time to deploy it to a device.
To install an application on your development device, you need a developer certificate from Apple. Developer certificates are issued to registered iOS Developers who have paid the developer fee. This certificate grants you the ability to sign your code, which allows it to run on a device. Without a valid certificate, devices will not run your application.
Apple’s Developer Program Portal (
http://developer.apple.com
) contains all the instructions and resources to get a valid certificate. The interface for the set-up process is continually being updated by Apple, so it is fruitless to describe it in detail. Instead, use the Development Provisioning Assistant, a step-by-step guide available on the program portal.
Work through the Development Provisioning Assistant,
paying careful attention to each screen
. At the end, you will have added the required certificates to
Keychain Access
and the provisioning profile to
Xcode
.
If you’re curious about what exactly is going on here, there are four important items in the provisioning process:
Developer Certificate
This certificate file is added to your Mac’s keychain using
Keychain Access
. It is used to digitally sign your code.
App ID
The application identifier is a string that uniquely identifies your application on the App Store. Application identifiers typically look like this:
com.bignerdranch.AwesomeApp
, where the name of the application follows the name of your company.The App ID in your provisioning profile must match the
bundle identifier
of your application. A development profile, like you just created, will have a wildcard character (*) for its App ID and therefore will match any bundle identifier. To see the bundle identifier for the
Quiz
application, select the project in the project navigator. Then select the
Quiz
target and the
Summary
pane.
Device ID (UDID)
This identifier is unique for each iOS device.
Provisioning Profile
This is a file that lives on your development device and on your computer. It references a Developer Certificate, a single App ID, and a list of the device IDs for the devices that the application can be installed on. This file is suffixed with
.mobileprovision
.
When an application is deployed to a device,
Xcode
uses a provisioning profile on your computer to access the appropriate certificate. This certificate is used to sign the application binary. Then, the development device’s UDID is matched to one of the UDIDs contained within the provisioning profile, and the App ID is matched to the bundle identifier. The signed binary is then sent to your development device where it is confirmed by the same provisioning profile on the device and, finally, launched.
Open
Xcode
and plug your development device (iPhone, iPod touch, or iPad) into your computer. This will automatically open the
Organizer
window, which you can re-open by clicking the button from the top right corner of the workspace. You can select
Devices
from the top of the
Organizer
window to view all of the provisioning information.
To run the
Quiz
application on your device, you must tell
Xcode
to deploy to the device instead of the simulator. Locate the pop-up button named
Scheme
in the top left of the workspace window. Choose
iOS Device
from the right portion of the list, as shown in
Figure 1.23
. (If
iOS Device
is not an option, find the choice that reads something like
Joe Conway's iPhone
.) Build and run your application (Command-R), and it will appear on your device.
Figure 1.23 Choosing the device

Once the
Quiz
application is installed on your development device, return to the device’s Home screen. You’ll see that its icon is a plain white tile. Let’s give
Quiz
a better icon.
An
application icon
is a simple image that represents the application on the iOS desktop. Different devices require different sized icons, and these requirements are shown in
Table 1.1
.
Table 1.1 Application icon sizes by device
| Device | Application icon size |
|---|---|
| iPhone/iPod touch without Retina display | 57x57 pixels |
| iPhone/iPod touch with Retina display | 114x114 pixels |
| iPad | 72x72 pixels |
If you supply a single application icon image at 57x57 pixels, that image will be scaled up on devices where a larger icon is required. This is never good. A scaled-up icon will be pixellated and scream,
“
We’re amateurs!
”
to your customers. Therefore, any application you deploy to the App Store should have an icon for every device class on which it can run.
We have prepared two icon image files (sizes 57x57 and 114x114) for the
Quiz
application. You can download these icons (along with resources for other chapters) from
http://www.bignerdranch.com/solutions/iOSProgramming3ed.zip
. Unzip
iOSProgramming3ed.zip
and find the
Icon.png
and the
[email protected]
files in the
Resources
directory of the unzipped folder. (If you open these images, you’ll see that they aren’t glossy and don’t have rounded corners like other application icons. These effects are applied for you by the OS.)
Now you’re going to add these icons to your application bundle as
resources
. In general, there are two kinds of files in an application: code and resources. Code (like
QuizViewController.h
and
QuizViewController.m
) is used to create the application itself. Resources are things like images and sounds that are used by the application at runtime. XIB files, which are read in at runtime, are also resources.
In the project navigator, select the
Quiz
project, which is at the top of the list and slightly shaded. Then, in the editor area, select
Quiz
from under the
Targets
heading. Finally, select
Summary
from the top of the editor area (
Figure 1.24
).
Figure 1.24 Adding the smaller icon in the Summary panel
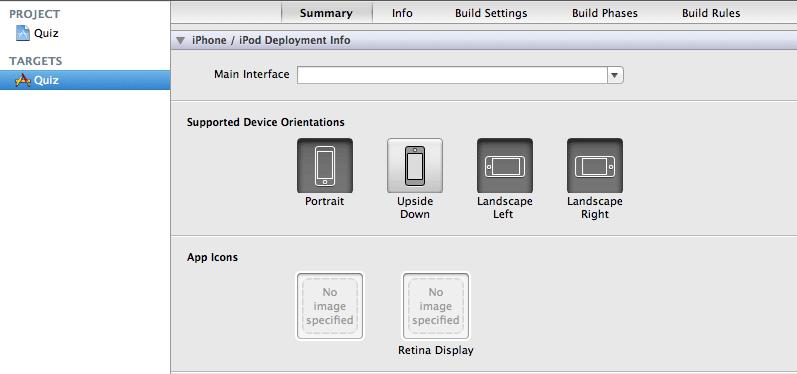
This panel is where you can set a number of options for the application, including its icon. Drag the
Icon.png
file from
Finder
onto the tile in the
App Icons
section. This will copy the
Icon.png
file into your project’s directory on the filesystem and add a reference to that file in the project navigator. (You can Control-click on a file in the project navigator and select the option to
Show in Finder
to confirm this.)
Next, drag the
[email protected]
file from
Finder
onto the tile labeled
Retina Display
. (Note that there isn’t a tile here for the iPad because
Quiz
is an iPhone application.)
Build and run the application again. After you exit the application, you should see the
Quiz
application with the BNR logo.
When you dragged the image files onto the icon tiles, two things happened. First, the image files were added to your project. (You can verify this by returning to the project navigator, where you’ll find
Icon.png
and
[email protected]
in the list of files.) Second, two entries were made in the
Quiz-Info.plist
file. When you add an icon, the
Icon files
value is updated with the names of the files you added. You can verify this by selecting
Quiz-Info.plist
and viewing it in the editor area. You can also select the
Info
item next to
Summary
to see the same information.
Another item you can set for an application in the
Summary
panel is the
launch image
, which appears while an application is loading. (If you don’t supply a launch image, the user will see a black screen during this period.) The launch image has a specific role on iOS: it conveys to the user that the application is indeed launching and depicts the user interface that the user will interact with once the application has finished launching. Therefore, a good launch image is a content-less screenshot of the application. For example, the
Weather
application’s interface is a rounded square with the name of a city and its current temperature;
Weather
’s launch image is just that rounded square. (Keep in mind that the launch image is replaced after the application has launched; it does not become the background image of the application.)
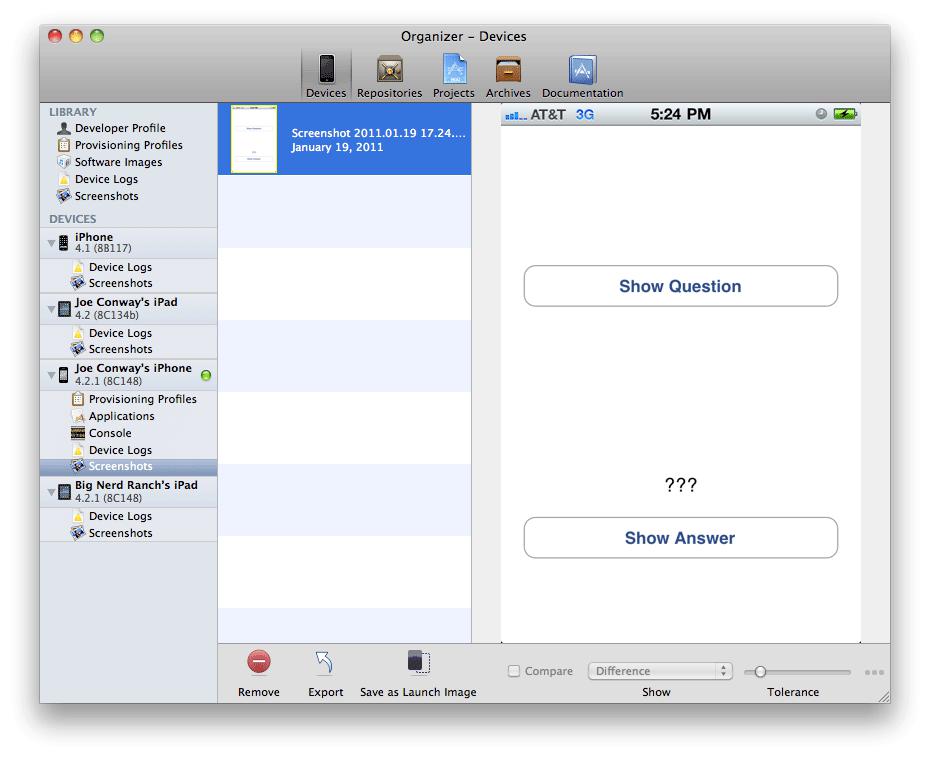
Xcode
can grab a screenshot from your device, and you can use this screenshot as the launch image for
Quiz
. To get a screenshot, build and run
Quiz
on a device. Open the
Organizer
window in
Xcode
and locate your device from the device list. (It will be the one with a green dot next to it.) Underneath your device, select the
Screenshots
item. In the bottom righthand corner of the editor area, click
New Screenshot
, and the screenshot will appear in the editor area. You can either drag this image onto the
Launch Images
tile or click the
Save as Launch Image
button at the bottom of the
Organizer
window (
Figure 1.25
). (For most applications, you will first have to edit the screenshot in an image-editing application to get the right look.)
Figure 1.25 Taking a screenshot with Xcode
Build and run the application. As the application launches, you will briefly see the launch image.
A launch image must fit the screen of the device it is being launched on.
Table 1.2
shows the different size images you will need for each type of device.
Table 1.2 Launch image sizes by device
| Device | Launch image size |
|---|---|
| iPhone/iPod touch without Retina display | 320x480 pixels |
| iPhone/iPod touch with Retina display | 640x960 pixels |
| iPad | 1024x768 pixels |
(Note that
Table 1.2
lists the screen resolutions of the devices; the real status bar is overlaid on top of the status bar in the launch image.)
Just like with application icons, there are tiles for different-sized images for each supported device. And, just like with icons, if you provide only one image, that image will be scaled to fit the device’s screen. So provide an image for every possible device.
One thing the launch image should
not
do is display a splash screen for your company or application. While many applications (especially games) use splash screens as launch images, here is the argument against it: The amount of time it takes to load any application depends on the hardware it is running on. Right now, iOS devices aren’t very powerful, and a large application may take a few seconds to load. This gives the user ample time to ingest a launch image. However, as iOS devices become more powerful, that launch image may only appear for a fraction of a second. This would appear as a disconcerting flash to users, who would wonder,
“
Have I pressed something wrong? How do I go back to that screen?
”
There are infinite ways of expressing your creativity on the platform from within an application – the launch image isn’t one of them.
Congratulations! You have written your first application and installed it on your device. Now it is time to dive into the big ideas that make it work.