Mastering the Craft of Making Sausage (4 page)
Read Mastering the Craft of Making Sausage Online
Authors: Warren R. Anderson
Tags: #Methods, #Cooking, #General, #Specific Ingredients, #Cooking (Sausages), #Sausages, #Meat

The diameter of the pressure plate is a little less than the internal diameter of the elbow-macaroni-shaped ground-meat hopper. The smaller diameter is necessary so that the pressure plate can pass through the curved hopper cavity without binding. This smaller diameter of the pressure plate creates a minor problem, however: When the lever is pushed down, most of the sausage will flow out of the tube and into the casing as it should, but some of the sausage will flow back around the edges of the pressure plate. This problem is called
backflow
.
This backflow problem can be minimized or eliminated if a homemade gasket is used. Cut a circular gasket from dense foam rubber; the diameter should be a little larger than the internal diameter of the hopper cavity. Wrap this gasket in plastic food wrap (to keep it clean), and place it between the sausage paste and the pressure plate. The gasket will prevent almost all of the backflow.
Another way to reduce backflow is to tear off about one foot of aluminum foil and fold it twice, making a square with four layers of foil. Place this between the sausage paste and the pressure plate. The foil functions as a gasket and reduces the backflow.
Another minor problem with these stuffers is that the pressure plate will not push out all of the sausage. This is because the pressure plate will stop near the front of the stuffer at the point where the nose of the stuffer begins to taper down toward the stuffing tube. About pound (150 g) of sausage will remain in this conical-shaped cavity. Most of this sausage can be pushed into the stuffing tube by using the following method:
Crumple two sheets of newspaper into a ball, and place it in a plastic bag. Seal the bag with a bread-bag twist tie and place it just under the pressure plate. Most of the sausage paste remaining in the stuffer will be forced into the stuffing tube by this crumpled newspaper in the plastic bag.
Another option is to use a molding compound called
water putty
to mold a cone that will push out the remaining sausage paste into the stuffing tube. (Such a homemade cone is pictured in the photograph of the lever-powered sausage stuffer.) Water putty is available at all hardware stores, and instructions for use as a molding compound are on the container. For sanitary reasons, the cone should be wrapped in plastic food wrap before each use.
Appendix 5 offers suggestions about where to purchase these stuffers.
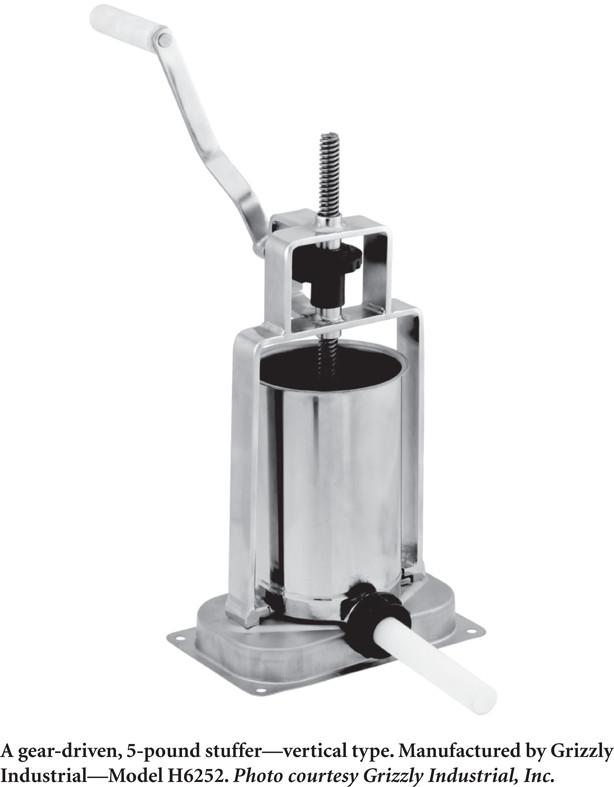
GEAR-DRIVEN STUFFERS
The most popular gear driven stuffer is the five-pound capacity upright style (also called
vertical stuffer
), and this style will be discussed below. Except for the different orientation, the horizontal style that lies on its side will operate in about the same way as the upright style.

Compared to the lever-powered cast-iron stuffer, the gear-driven stuffer has a couple of negative points—but many positive points.
The negative points are:
- The price of the gear-driven stuffer is several times that of the lever-operated, cast-iron model.
- The gear-driven stuffer will not tolerate as much abuse as the nearly indestructible cast-iron stuffer. The gear-driven stuffer has some plastic and synthetic rubber parts, and the most fragile of these parts are the plastic gears and plastic push-rod threads. If gorilla-like force is used when the piston reaches the bottom of the cylinder, the threads might be stripped, or the gear teeth might be broken. If reasonable care is exercised, however, it should last for many years. When the piston reaches the bottom of the cylinder, STOP—don’t try to force out another thimble-full of sausage paste!
The positive points of the gear-driven stuffer are as follows:
- The crank on the geared stuffer extrudes the sausage paste more easily than the lever on the cast-iron model; much less force is required for the crank.
- The gasket ring that attaches to the circumference of the piston prevents the backflow problem that is common with the cast-iron lever stuffers.
- The weight of the geared stuffer is much less than the weight of the cast-iron one.
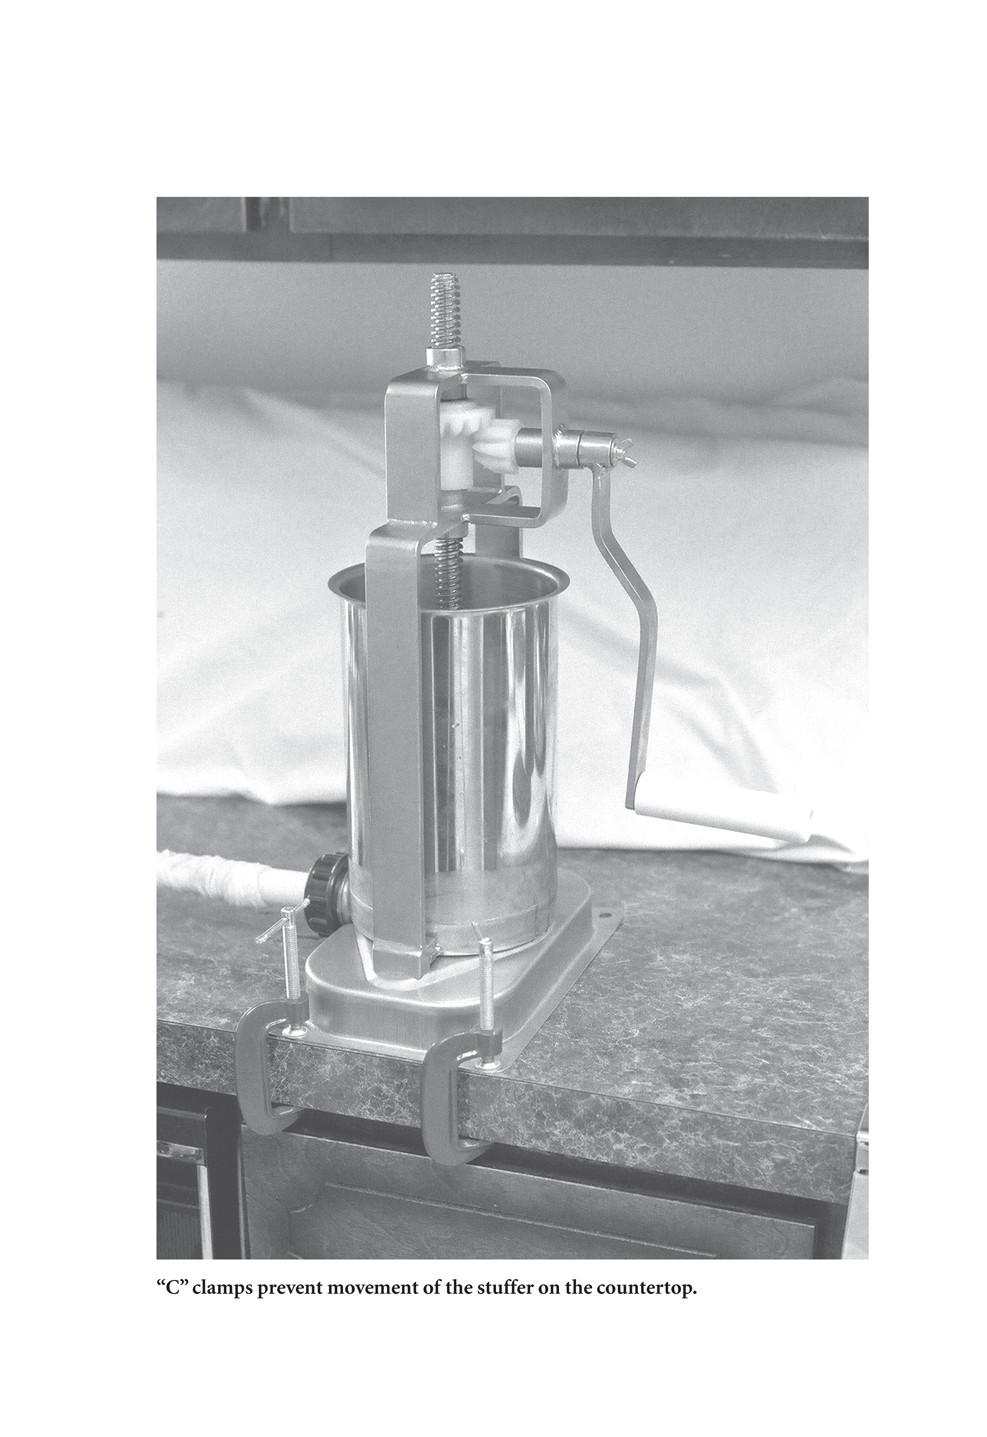
- A mounting board is not required for the geared stuffer; two “C” clamps will prevent the stuffer from moving on the counter.
- Cleanup is easier for the geared model because the stuffer is lighter and because only the parts that are exposed to the sausage paste need be washed.
- The five-pound (2,270 g) geared model will hold five pounds of sausage paste. However, the lever-powered stuffer is almost impossible to use if more than half the rated capacity is loaded; this is because a load of over half of the rated capacity rapidly reduces the leverage.
Appendix 5 offers suggestions about where to purchase these stuffers.
WATER-POWERED SAUSAGE STUFFERS
Water-powered sausage stuffers with a horizontal orientation allow hands-free operation. Both hands can be used to manage the business of stuffing the sausage paste in the casing. The disadvantage is that two garden hoses must be attached to the stuffer. One hose connects to a faucet with threads suitable to screw on a garden hose, and the other hose goes to a floor drain or a catch bucket.
CARE OF STUFFING EQUIPMENT
No matter what kind of stuffing equipment you are using, it should be washed in hot, soapy water as soon as the stuffing work is finished. If the particles of meat remaining on the equipment become dry, they are very difficult to remove. If the equipment cannot be washed immediately, spray it with water or soak it in water in order to keep the meat particles moist.

After the various parts have been washed and rinsed, they may be air dried, unless they are made of unprotected cast iron or steel. Such parts might rust if they are allowed to air dry, so they should be dried by hand right away.
Thermometers for Cooking
Thermometers are desirable for cooking all sausages that have been stuffed in casings. The method of cooking determines the best kind of thermometer for the job; sometimes two thermometers, used simultaneously, make the cooking easier. The thermometers described below will meet all of our needs adequately, and all of them are affordable.
We should not expect these inexpensive thermometers to be perfectly accurate throughout the measurement range. Presumably, they were calibrated at the factory, or they met the tolerance standards of the manufacturer. For a home-use thermometer, the manufacture’s tolerance is usually about plus or minus two degrees. Nevertheless, it is a good idea to check the thermometers for accuracy. I bought a digital thermometer with a cable probe recently, and I tested it using the method described below. I discovered that my thermometer read 192° F (89° C) instead of 212° F (100° C)—an error of 20 degrees! I telephoned the manufacturer, described how I tested it, and they sent me a replacement immediately.
To test the thermometers, fill a saucepan with water and bring the water to a boil. Next, measure the temperature of the boiling water. We know that the temperature of boiling water is 212° F (100° C). When the thermometer is read, the accuracy will be obvious. Of course, water boils at a lower temperature than 212° F (100° C) if it is significantly above sea level. Consequently, if you live somewhere like Denver, Colorado, compensation must be made for the high altitude.
If your thermometer does not read correctly, check the instructions to see if it can be calibrated. If it cannot be calibrated, compensation should be made for the error whenever it is used, or the manufacturer should be contacted for a replacement. The most important range for a sausage thermometer is 155° F (68° C) to 165° F (74° C), but it is difficult to check the thermometer for accuracy in that range. We are forced to assume the error in this range is the same as the error we observed when measuring the temperature of boiling water.
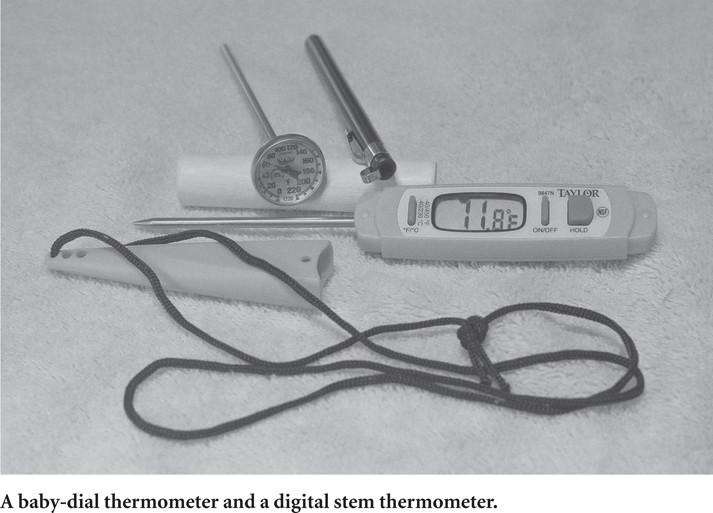
DIAL AND BABY-DIAL THERMOMETERS
The baby-dial thermometer is very useful to check the internal temperature of cooked sausage. When it is used in this way, you might say that it is a kind of miniature meat thermometer. It has a temperature dial about the size of the face of a men’s round wristwatch. The stem of the baby-dial thermometer will withstand very high temperatures, but the dial itself is delicate, and it cannot withstand the hot temperatures present inside a kitchen oven, for example.
Using this thermometer in such a hot environment will likely destroy or damage it
.
The baby-dial thermometer is also very useful for poaching sausages. This thermometer can be used to check the water temperature, as well as the internal temperature of the sausages. It can also be used to check the internal temperature of sausages being cooked in a hot smoker; however, the sausage is usually removed from the smoker before using the thermometer. Because it is an instant-read thermometer, the dial will show the internal temperature about 15 to 20 seconds after it is inserted.
The calibration of the baby-dial thermometer is from about 0° F (-18° C) to 220° F (104° C). You should be able to obtain one from a mail-order establishment that deals in sausage-making equipment and supplies, a hardware store, or from a retailer that sells culinary items.

A larger type of dial thermometer is calibrated in the same way as the baby-dial thermometer, and can be used in its place for most applications. It has a longer and thicker stem, and it will probably cost over twice as much as a baby-dial. The dial of this thermometer is just as delicate as the dial of the baby-dial thermometer; it cannot be used inside an oven or in a hot smoke chamber.
These dial thermometers have the temperature sensors near the point— not at the point—so they must be inserted about 2 to 2½ inches (5 to 6.5 cm) into the meat to get a representative sample of the internal heat.
DIGITAL STEM THERMOMETERS
Improving technology has made it possible to manufacture digital stem thermometers and sell them at a price that is competitive with dial thermometers. The cost is more than for the dial thermometers, and they require a battery, but many people do not hesitate to spend a little more money for high-tech equipment.