Chinese Brush Painting (17 page)
Read Chinese Brush Painting Online
Authors: Caroline Self,Susan Self

1.
Load the brush with medium light mix and tip the end of the brush into the dark mix.
2.
Stroke a section of a bamboo stalk. Notice the dark area on the left side, which makes the bamboo stalk look more rounded.
3.
You can also make a second, narrower stalk by holding your arm up slightly and using only a portion of the brush.
Adding Leaf Clusters to Stalks
Now that you have practiced leaf clusters, you can add them to stalks.
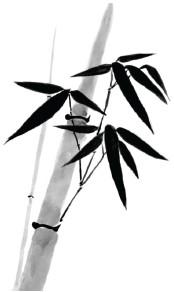
1.
Paint one or more bamboo stalks.
2.
Plan where you will place each of your three clusters.
3.
Paint the leaf clusters. Start with the top left clusters and then do the right clusters. Be careful not to smear the strokes with your hand.
4.
Add the branches that attach the clusters to the bamboo stalk at the joint. Load the small brush with dark paint and roll it to make a fine point.
5.
Pick a joint on one side and paint a thin line toward the center of the cluster to make a small branch.
6.
Add other branches from a joint to a cluster as needed. Remember to put no more than two branches from the same joint and to change sides with each joint.
7.
Practice different designs of leaf clusters attached to stalks and branches.
Painting Bamboo on Rice Paper
When your practice painting is the best you can do, go ahead and paint the whole design on rice paper. Practice using less water on the brush by tapping it on a paper towel to take out some of the water. This action will keep the paint from running too much on the paper and making a fuzzy blob. Remember to paint on the smooth side of the rice paper for best results.
Painting
Pine

Pine belongs to the set of classic subjects called the Three Friends of Winter: bamboo, plum blossom, and pine. Because it is an evergreen, it is considered a symbol of longevity, sturdiness, and endurance. It blows in the wind, its branches break, and the trunk blows over. But it still survives for years with scars that show its history. The Chinese call the tree “a gentleman of character.” Pine is useful for fuel, furniture, baskets, and food in the form of pine nuts. Its soot is used to make inksticks.
A pine tree usually grows symmetrically unless branches are hit by lightning or break. But the side that gets the most sun grows better and may have longer and fuller needles. The Chinese like to paint pines in an asymmetric way that has been copied over many years. The bark looks like the scales on a fish. The technique for painting it is called
bark scales
.
Pines can be painted with snow on the branches or with pine cones hanging down. Most painters show the pine as tall and stately, with its branches reaching out in all directions. These branches can vary in size and direction, with some of the needles hanging among the pine cones.
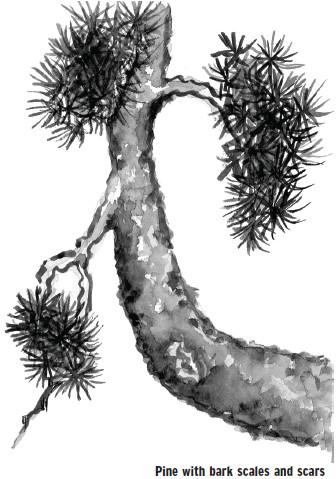
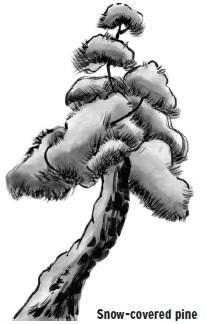
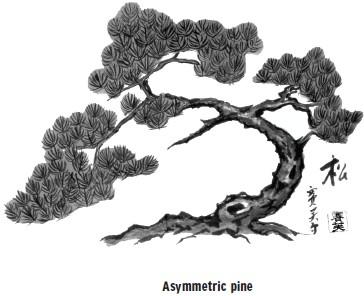
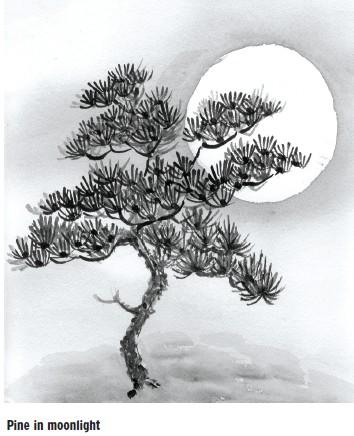
Pine is also painted standing in front of the moon. Some species of pine have clusters of long needles hanging down, like ballerina skirts. Others have needles growing along the tips of the branches. Others have needle clusters like half wheels. There are usually 3, 5, or 7 branches with clusters of needles.
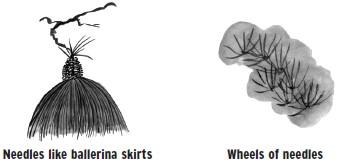
The artist usually paints branches growing off the parts of the trunk that are lumpy. Knots in the trunk are part of where the branch grows out. Branches are thicker near the trunk and get thinner as they grow outward.
A branch is painted not with a straight line but with the familiar press, drag, and lift stroke. You typically plan where you would place five clusters of needles before painting any branches. Plan how the wheels of needles overlap to make a cluster. Make each cluster a different size. Usually the larger clusters are at the bottom unless they overlap to make a large cluster up higher.

Painting the Trunk
There are several ways to start the pine tree trunk. You can try each way and then decide which is best for you. The brushstrokes for pine are similar to those you have tried before, with slight changes.
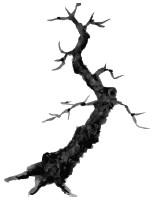
Press-and-Lift Method
Practice with your finger at the bottom of the page instead of a brush. Press down, drag it upward a little, and lift a little; then press again, drag up, and lift. Try this several times so your arm will move smoothly between press, drag, lift, and press. This is a very important stroke that is used in many ways.
1.
Load the large brush with the dark paint mix and roll it forward and back so the hairs are filled with paint. Rotate your hand to the right into position #2.
2.
Starting at the bottom of the page, press, drag up a bit, lift, press, drag up, lift, and so on.
3.
Work your way up the page, making areas of thick and thin and getting smaller overall as you go up the paper.