Chinese Brush Painting (24 page)
Read Chinese Brush Painting Online
Authors: Caroline Self,Susan Self

Dotted branches.
Add even dots along the trunk, making more where the tree gets fatter and fewer where the tree has fewer leaves at the bottom.
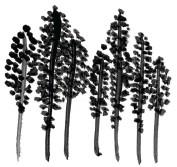
Painting the Middle Space Trees
Middle space trees are closer to the viewer than trees in the distance.
This type of tree can be a point of interest at the bottom of the mountain. The tree will be more anchored if you add some roots growing up out of the ground. For the main part of the painting, use larger trees, such as those painted in the pine lesson. Make the branches overlap, and make each tree different.
For the mountain scene, paint a cluster of three trees as shown, using what you learned in the pine chapter.
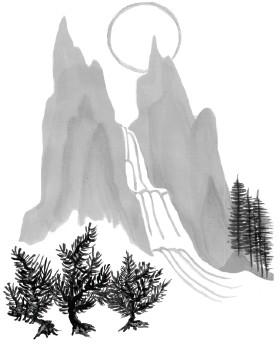
1.
Put a host tree in the center. Make the trunk zig to the left and zag to the right, with branches coming off in several places.
2.
Left of the host tree, paint a smaller trunk and again zigzag to make it more interesting.
3.
Right of the host tree, make a guest trunk that is different from the other trunks.
4.
For the leaves, use straight lines as on the pine tree.
Painting on Rice Paper
After practicing this landscape on newsprint, try doing it on rice paper. Remember to paint on the smooth side of the rice paper so the little strokes do not blur.
Adding Calligraphy
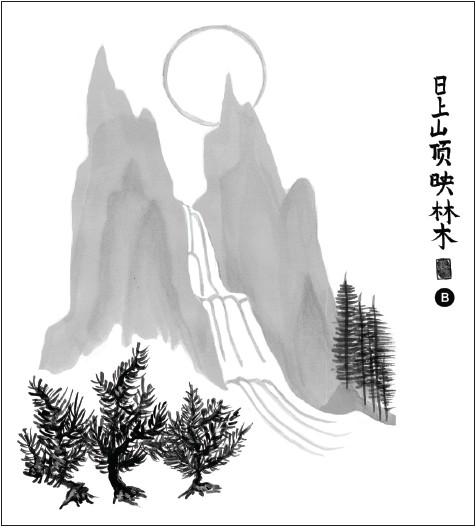
After you have painted the landscape, you can describe the scene with calligraphy. Practice doing the calligraphy on a separate piece of paper before putting it in your painting.
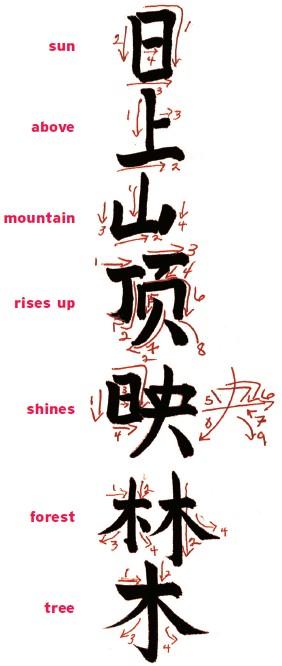
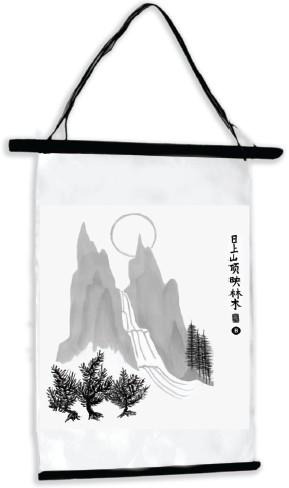
The characters translate into the following sentence: “The sun rises over the mountain and shines on the forest of trees.” Since you have learned the basic strokes for mountain, water, sun, forest, and tree, you can use this calligraphy to tell the story down the right-hand side of your landscape painting.
Now that you have painted your masterpiece mountain scene on rice paper, very carefully put in the calligraphy that describes the scene. Add your thumbprint and/or your seal.
Mounting
Your
Paintings
The Purpose of Mounting
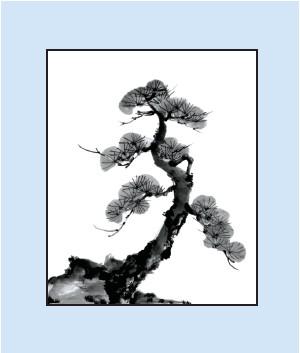
Oriental brush painting is done on thin rice paper that leaves puckers when the ink dries. The process of mounting or “attaching” the thin paper onto thicker, more substantial paper reinforces the thin paper and smooths out the puckers. It also helps to protect the paper against damage by insects, such as silverfish, who love rice paper for lunch. After a painting has been backed, you can put it in a mat or mount it as a hanging scroll.
Backing a Painting
The traditional way to back a painting is to use a paste like wallpaper paste. This method works fine with ink but does not work well with tempera paint because the paint tends to bleed out with the moisture from the paste. For this reason, it is better to mount your painting using a modern spray adhesive.
Materials Needed All-purpose spray adhesive
 A newspaper spread out to protect the table
 A clean, dry, 3–4” brush to smooth out the wrinkles
 A roll of backing paper with a different surface from the painting paper (you can get this where rice paper is sold), or else sheets of watercolor paper
1.
Even up the edges of your painting if they are irregular.
2.
Plan the size of the painting, and lay it down on the backing paper so you can add 1–2” beyond the painting. Remove your painting. Cut the backing paper with the extra 1–2” all around.
3.
Spray the adhesive in a thin, even layer over the entire piece of backing paper.
4.
Carefully lay the rice paper painting on top of the backing paper.
5.
With the brush, gently stroke from the center of the painting outward to get rid of air bubbles and wrinkles. Use your finger to smooth out small wrinkles.
6.
Let the adhesive dry overnight before moving the paper.