DIY Projects for the Self-Sufficient Homeowner: 25 Ways to Build a Self-Reliant Lifestyle (19 page)
Authors: Betsy Matheson
Tags: #Non-Fiction

Sheet plastic is
an inexpensive material for creating a greenhouse. Obviously, it is less durable than polycarbonate, fiberglass, or glass panels. But UV-stabilized films at least 6-mil thick can be rated to withstand four years or more of exposure. Inexpensive polyethylene sheeting (the kind you find at hardware stores) will hold up for a year or two, but it becomes brittle when exposed to sunlight. Some greenhouse builders prefer to use clear plastic sheeting to maximize the sunlight penetration, but the cloudiness of translucent poly makes it effective for diffusing light and preventing overheating. For the highest quality film coverings, look for film rated for greenhouse and agricultural use.
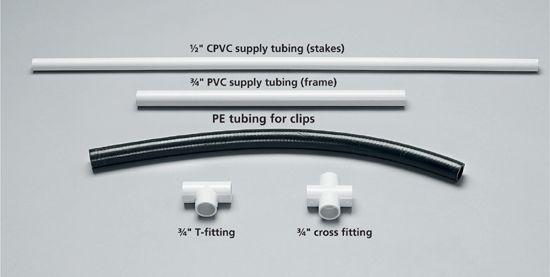
Plastic tubing and fittings used to build this hoophouse include: Light duty 3/4" PVC tubing for the frame (do not use CPVC—it is too rigid and won’t bend properly); 1/2" CPVC supply tubing for the frame stakes (rigidity is good here); Polyethylene (PE) tubing for the cover clips; T-fittings and cross fittings to join the frame members.
Building a Hoophouse
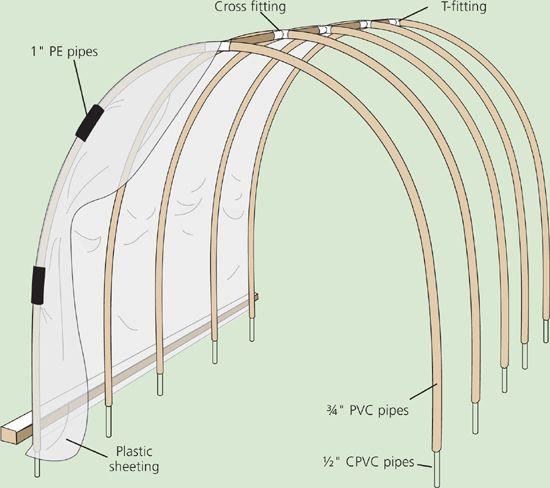
TOOLS AND MATERIALS
(for 10-ft. wide × 15-ft. long project seen here)
(12) 3/4" × 10 ft. PVC pipes
(3) 1/2" × 10 ft. CPVC pipes
(1) 1" × 10 ft. PE pipe (black)
(3) 3/4" PVC cross fittings
(2) 3/4" PVC T-fittings
20 × 16 ft. clear or translucent plastic sheeting
(4) 12-ft. pressure-treated 2 × 4
Stakes
Mason’s string
Tape measure
Circular saw
Painters’ tape
Mallet
Maul
Stapler
2-1/2" deck screws
Drill
How to Build a Hoophouse
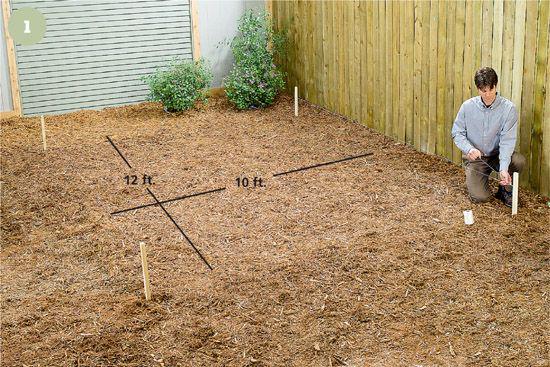
1 Lay out the
installation area using stakes and mason’s string. Strive for square corners, but keep in mind that these are relatively forgiving structures, so you can miss by a little bit and probably won’t be able to notice.
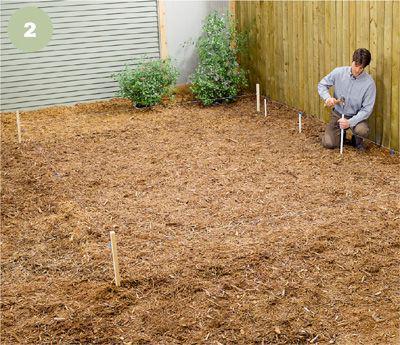
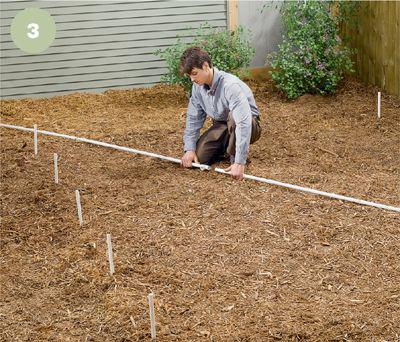
2 Cut a 30"-long stake
from 1/2" CPVC supply tubing for each leg of each hoop frame. Measure out from the corners of the layout and attach a piece of high-visibility tape on the string at 3-ft. intervals; then drive a stake at each location. When the stake is fully driven, 10" should be above ground and 20" below.
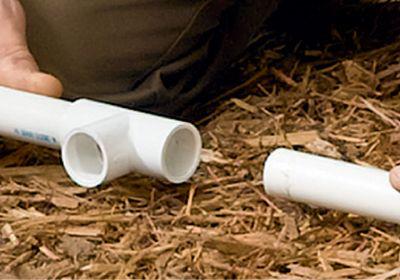
3 Join the two legs
for each frame hoop with a fitting. Use a tee fitting for the end hoop frames and a cross fitting for the intermediate hoop frames. No priming or solvent gluing is necessary. (The friction-fit should be sufficient, but it helps if you tap on the end of the fitting with a mallet to seat it.)
4 Slip the open end
of one hoop-frame leg over a corner stake so the pipe is flush against the ground. Then bend the pipes so you can fit the other leg end over the stake at the opposite corner. If you experience problems with the pipes pulling out of the top fitting, simply tape the joints temporarily until the structure frame is completed.
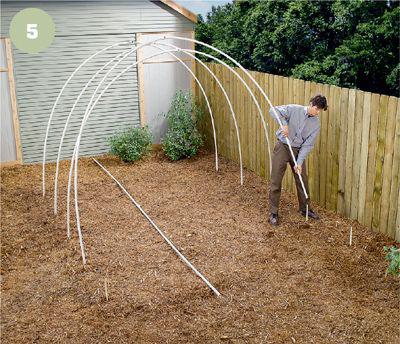
5 Continue adding hoop frames
until you reach the other end of the structure. Wait until all the hoop frames are in place before you begin installing the ridge poles. Make sure the cross fittings on the intermediate hoop frames are aligned correctly to accept the ridge poles.
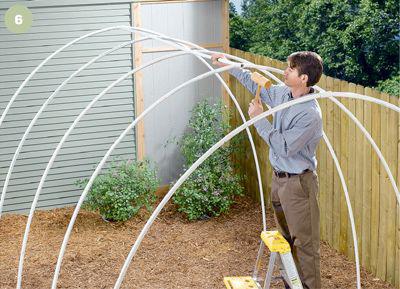
6 Add the ridge-pole
sections between the hoop frames. Pound on the end of each new section as you install it to seat it fully into the fitting. Install all of the poles.
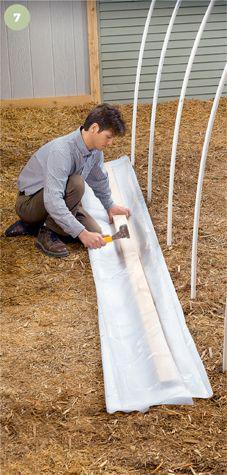
7 Cut four pieces
of pressure-treated 2 × 4 to the length of the hoophouse (12 ft. as shown). Cut the roof cover material to size. (We used 6-mil polyethylene sheeting.) It should be several inches longer than is necessary in each direction. Tack the cover material at one end of the 2 × 4 and then continue tacking it as you work your way toward the end. Make sure the material stays taut and crease-free as you go.