The Everything Guide to Cooking Sous Vide (6 page)
Read The Everything Guide to Cooking Sous Vide Online
Authors: Steve Cylka

Suction-type bags work best when ingredients do not have lots of marinade or liquid surrounding them.
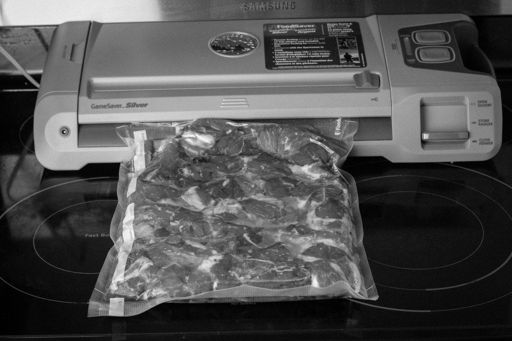
Cubed pork roast being prepared in a FoodSaver vacuum sealer

Ingredients being prepared in a chamber vacuum sealer
Chamber Vacuum Sealers
The chamber vacuum sealer works with a very different technique than the suction-type model. Food is placed in a food-safe bag and then put into a “chamber.” The door/lid of the machine is closed with the entire bag in this chamber space. Once the vacuum sealer is initialized, air is pulled out of the chamber and it is pressurized. Once the air is drawn out of the chamber, the heat strip seals the bag. Then the air is drawn back into the chamber and the lid can be lifted.
Chamber vacuums are significantly more effective than suction-type machines, and they work just fine with liquid. Chamber vacuums are so good at sealing liquid in a bag that it is even possible to vacuum seal a bag of soup. With most chamber vacuums it is also possible to adjust how much air is pulled out of the chamber. This is great for vacuum sealing delicate food like salmon.
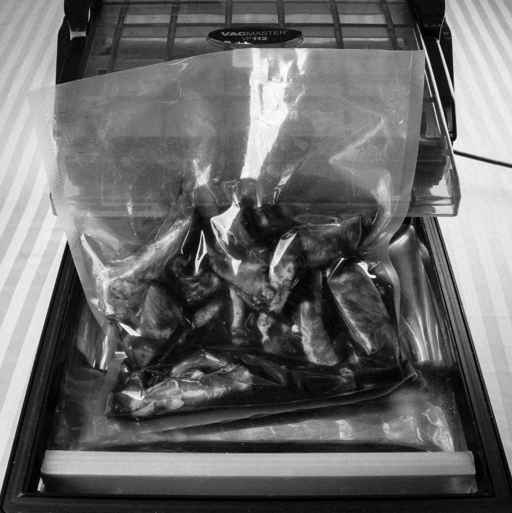
A sealed chamber vacuum bag
The main downside of chamber vacuums is the cost, as they are significantly more expensive than standard suction-type machines. While they are pricey and usually out of reach for most home cooks, they do use food-safe bags that are much cheaper than the bags suction-type vacuum sealers use. Therefore, over time, the cost difference does balance out.
Handheld Vacuum Sealers
Another type of vacuum sealer is the handheld model. These use specialized food-safe bags that have a valve, usually in the corner of the bag. The vacuum sealer is held over the valve and then turned on. This draws the air out of the bag and the valve is sealed shut.
These machines do have some advantages over the other vacuum sealers. Handheld machines are much smaller than the larger units, so they are easy to stick in the drawer of a small kitchen. Much cheaper, these machines are an economical alternative to some of the pricier vacuum sealers on the market. The major downside of these machines is that while they may seem cheaper, they require very specific bags that are often more expensive than standard vacuum sealer bags. Therefore, these machines will end up costing more than other machines on the market that have a higher initial cost.
Zip-Top Bags
It is actually possible to use sturdy food-safe zipper bags. These bags do not work with vacuum sealers, therefore, the air is removed manually. Food is placed in the bag and the air is drawn out of the bag using the air displacement method, a process based on Archimedes’ principle. To use this technique, simply place the food in the bag and do not close or zip the seal. Slowly lower the bag into the water. As the bag enters the water, it will push the air out of the bag. Water will press up against the food in the bag, creating a vacuum environment. Lower the bag so that the zipper seal is just above the water. Now press the seal to close the bag and you have a manually made vacuum-sealed bag.

It is extremely important to use bags that are not only food-safe, but are also safe being heated. Check the manufacturer’s information to learn not only whether the plastic bag can be heated, but also the length of time it can be in a hot environment like a sous vide water bath.
Many people use zip-top bags when first starting sous vide cooking. These are a great way to first get going before investing in a vacuum sealer. This method is also great for working with liquids. Where suction-type vacuum sealers struggle with liquid, the air-displacement method and these bags work fine. One issue with zipper bags is there is a chance that the seal could break and they could open up in the water bath. This seems to happen more frequently while using sous vide immersion circulators, as the water moving around in the bath causes the bags to move, increasing the chance of them opening. Make sure that the seal is fully zipped and the bag is completely sealed before lowering into the water. Some companies have zipper bags specifically designed for sous vide cooking. SousVide Supreme sells zip-cooking pouches in different sizes, and these are designed for cooking at high temperatures.
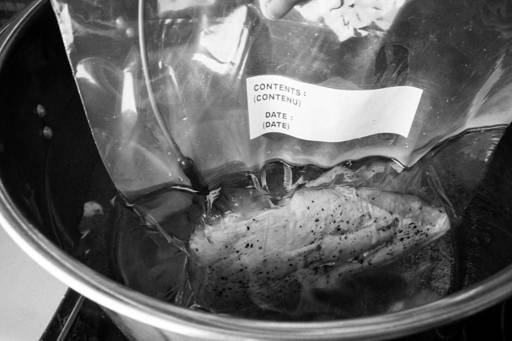
Slowly lowering zip-top bags into the water bath will force air out and create a vacuum environment.
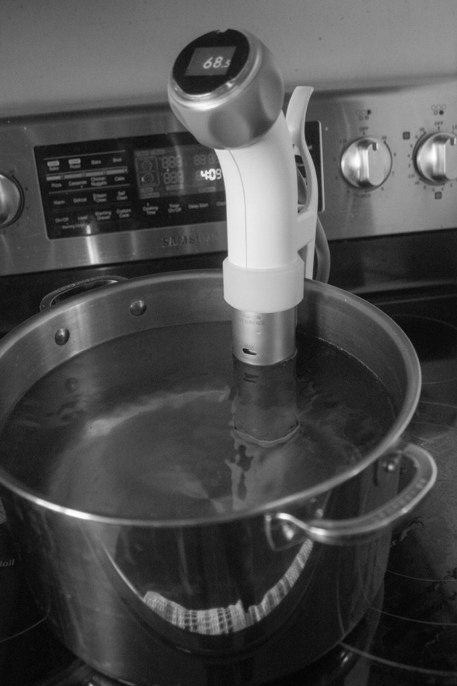
A Nomiku immersion circulator
Optional Additional Equipment
There are a number of other pieces of equipment that can enhance and simplify sous vide cooking. While these are not essential to creating quality meals using sous vide, they can make life a little easier for the cook.
Kitchen Torch
While the recipes in this book give instructions to sear using a skillet, a kitchen torch is another effective way to sear meat after it has come out of the water bath. The extreme heat from the flame of a kitchen torch will create a Maillard reaction, resulting in a crispy and extra-tasty meat exterior. The kitchen torch can simulate a hot grill and works really well for steak, pork chops, fish, and more. There are a number of small crème brûlée torches that are great, as well as powerful cooking torches that clamp on to a butane canister. These tend to have more adjustability in the size of the flame and can get hotter.
Digital Thermometer
Sous vide machines have built-in thermostats to measure the temperature of the water, but there may be times that you want to monitor the temperature of the food. In these cases, a quality digital thermometer is in order. Instead of an instant-read thermometer, the best kind for sous vide cooking is one with a long hypodermic probe with a cable/cord that is safe to put in the water. ThermoWorks makes excellent digital thermometers and has models that are safe and effective for sous vide cooking.
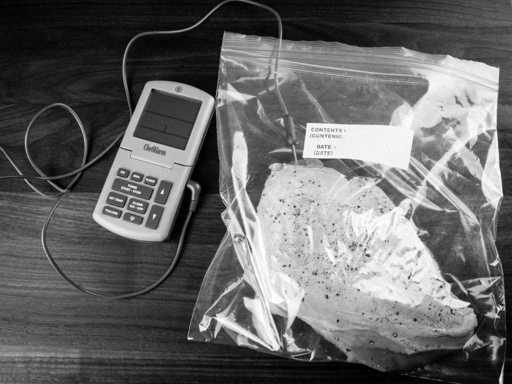
A digital thermometer with a probe and cable will help you monitor the internal temperature of your food.
Foam Tape
Piercing a digital thermometer hypodermic probe into a vacuum-sealed bag will break the seal and this can allow air and water into the bag. Placing some foam tape onto the bag and piercing through the tape into the bag will keep the seal intact. It is a cheap and effective way to ensure the food is vacuum sealed. Poly Science sells foam tape that is ideal for this purpose.
Polycarbonate Containers and Lids
Immersion circulators can be clamped on to a stockpot or cooler and work effectively, but polycarbonate containers are also an excellent choice. These containers usually hold much more water than a pot and their rectangular design is better for cooking multiple bags of food, allowing them to be evenly spaced and not crowded in a pot. Polycarbonate lids can be cut to create a hole for the immersion circulator to fit.
Chapter 3
Getting Started
There are some cooking techniques that are challenging and difficult to master. Tempering chocolate, cooking hard candy, making that perfect soufflé, or even rolling out a pie crust can be frustrating. The thought of trying a brand-new cooking method causes some people to run for the hills, because the last thing anyone needs is more frustration or more failure. It is understandable that you may feel that way about sous vide, but once you give it a go, you will discover that it is pretty darn easy! Using sous vide as a method for cooking is surprisingly simple and there are a handful of basic steps that, if followed, will produce quality results each and every time.