The Granny Square Book: Timeless Techniques and Fresh Ideas for Crocheting Square by Square (39 page)
Authors: Margaret Hubert
Tags: #Crafts & Hobbies, #Needlework, #Crocheting

This adorable baby sweater and hat set combines the technique of working a garment from the top down and using granny squares. Lighweight cotton yarn makes it comfortable for baby and easy to care for.
YARN
Tahki
Cotton Classic Lite
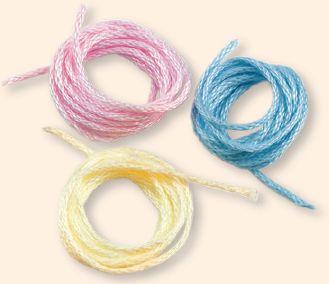
, 100% mercerized cotton, 1.75 oz (50 g)/146 yd (135 m): cotton candy #4443 (MC), 3 skeins; pale lemon yellow #4532 (a), 1 skein; light blue #4812 (B), 1 skein, will make both sweater and hat.
HOOKS
sweater: F/5 (3.75 mm) for size 2 and 4 yoke
F/5 (3.75 mm) for size 2 squares
G/6 (4 mm) for size 4 squares
Hat: F/5 (3.75 mm) for size 2; G/6 (4 mm) for size 4
GAUGE
1 square = 5" × 5" (12.5 × 12.5 cm) with F/5 (3.75 mm) hook
1 square = 5 1/2" × 5 1/2" (14 × 14 cm) with g/6 (4 mm) hook
18 dc = 4" (10 cm) with F/5 (3.75 mm) hook
NOTIONS
Tapestry needle
FINISHED SIZE
Sweater: sizes 2 (4)
Finished chest: 22" (24)" (56 [61] cm)
Hat: 16" (40.5 cm) in circumference; 6" (15 cm) deep for size 2
17 1/2" (44.5 cm) in circumference, 7 1/2" (19 cm) deep f or size 4
SKILL LEVEL
Intermediate

Made with 3 colors: MC, A, and B.
V-stitch (V-st): (1 dc, ch 1, 1 dc) in same st or sp.
Beginning cluster (beg cluster): Ch 3, [yo, insert hook in st or sp, yo, draw up a loop, yo, draw through 2 Ips] twice in same st or sp, yo, draw through 3 loops on hook.
Cluster: [Yo, insert hook in st or sp, yo, draw up a loop, yo, draw through 2 loops on hook] 3 times in same st or sp, yo, draw through 4 loops on hook.
Single crochet 2 together (sc2tog): [Insert hook in next st, yo, draw yarn through st] twice, yo, draw yarn through 3 loops on hook.
Picot: Ch 3, sc in 3rd ch from hook.
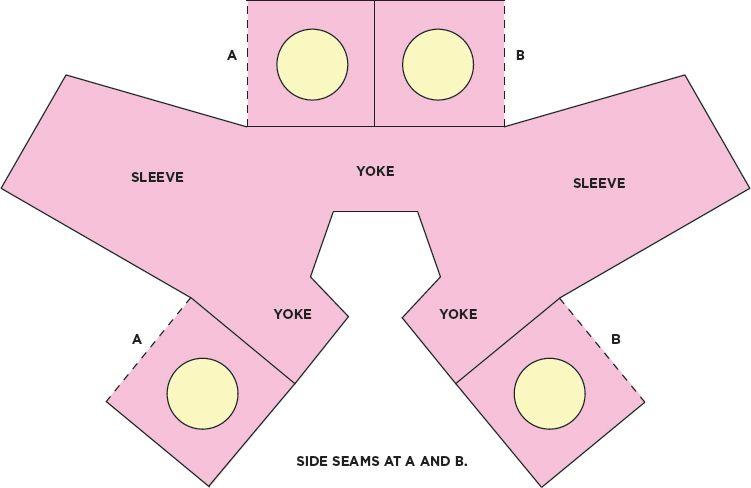
Each V-st inc adds 2 sts. Sweater yoke is worked from the neck down.
SWEATER
Starting at neck edge, with MC, ch 58 (64).
ROW 1:
1 dc in 4th ch from hook (counts as 2 dc), 1 dc in each of next 7 (8) ch (right front section), V-st in next ch (inc made), 1 dc in each of next 9 (10) ch (right sleeve section), V-st in next ch, 1 dc in each of the next 16 (18) ch (back section), V-st in next ch, 1 dc in each of next 9 (10) ch (left sleeve section), V-st in next ch, 1 dc in each of last 9 (10) ch (left front section), turn. There will be 9 (10) dc in each front section; 9 (10) dc in each sleeve section; 16 (18) dc in back section; sections will be divided by a V-st.
ROW 2:
Ch 3 (counts as a dc, now and throughout), sk first dc, *1 dc in each dc to next V-st, V-st in ch-1 sp of next V-st, rep from * 3 times, 1 dc in each dc to end, 1 dc in top of turning ch, turn.
ROWS 3–13 (3–14):
Rep row 3, inc 8 sts in every row. There will be 22 (24) sts on right front, 35 (38) on sleeve, 42 (46) sts on back, 35 (38) on sleeve, 22 (24) sts on left front: 156 (170) dc plus 4 ch-1 sps total.
DIVIDE FOR SLEEVES AND BODY
ROW 1:
Ch 3, sk first dc, dc on each of next 21 (23) sts of left front, ch 2, sk next 35 (38) dc of left sleeve, dc in each of next 42 (46) dc of back, ch 2, sk next 35 (38) dc of right sleeve, dc in each of last 21 (23) dc of right front, 1 dc in top of turning ch, turn (86 [94] dc).
ROW 2:
Ch 3, sk first dc, 1 dc in each of next 21 (23) sts, 1 dc in each of next 2 ch sts at underarm, 1 dc in each of the next 42 (48) dc, 1 dc in each of next 2 ch sts at underarm, 1 dc in each of the last 21 (23) dc, 1 dc in top of turning ch, turn (90 [98] dc). Fasten off.
SQUARES
Make 4 #50 Kaleidoscope Squares (
page 84
) with variations as follows:
FOUNDATION:
With A, ch 6, join with a SI st to form a ring.
RND 1:
With A, ch 4 (counts as dc, ch 1), [1 dc, ch 1] 7 times in ring, join with a SI st in 3rd ch of beg ch-3 (8 ch-1 sp).
RND 2:
With A, ch 3 (counts as dc), 1 dc in next ch-1 sp, *ch 2, 2 dc in next ch-1 sp, rep from * 6 times, ch 2, join with a SI st in the 3rd ch of beg ch-3 (8 groups of 2 dc, 8 ch-1 sps). Fasten off A.
RND 3:
With right side facing, join B in any ch-2 sp, ch 3, (beg cluster, ch 2, cluster, ch 2) in first sp, (cluster, ch 2, cluster, ch 2) in each ch-2 sp around, join with a SI st in 3rd ch of beg ch-3 (8 clusters, 16 ch-2 sps). Drop B to wrong side.
RND 4:
With right side facing, join MC in first ch-2 sp, ch 3, (beg cluster, ch 2, cluster) in first sp, ch 3 sk next ch-2 sp, *[1 cluster, ch 3] 3 times in next ch-2 sp, sk next ch-2 sp**, [cluster, ch 3] twice in next ch-2 sp, sk next ch-2 sp, rep from * twice, rep from * to ** once, join with a SI st in 3rd ch of beg ch-3 (4 groups of 3 clusters, 4 groups of 2 clusters). Drop MC to wrong side.
RND 5:
With right side facing, join A in first ch-3 sp between any 2-cluster group, ch 3, 2 dc in same sp (half corner made), *ch 2, 2 dc in next ch-3 sp, (ch 1, 1 sc) in each of next 2 ch-3 sp, ch 1, 2 dc in next ch-3 sp, ch 2**, (3 dc, ch 3, 3 dc) in next ch-3 sp (corner), rep from * twice, rep from * to ** once, 3 dc in same sp as first half corner, ch 3, join with a SI st in 3rd ch of beg ch-3. Drop A to wrong side, pick up B.
RND 6:
With B, ch 1, starting in same st, *1 sc in each of next 3 dc, 2 sc in next ch-2 sp, 1 sc in each of next 2 dc, [1 sc in next ch-1 sp, 1 sc in next sc] twice, 1 sc in next ch-1 sp, 1 sc in each of next 2 dc, 2 sc in next ch-2 sp, 1 sc in each of next 3 dc, (1 sc, ch 3, 1 sc) in next ch-3 sp (corner made), rep from * around, join with a SI st in first sc.
RND 7:
With B, ch 1, 1 sc in each sc across to next corner, (1 sc, ch 3, 1 sc) in next ch-3 sp, rep from * 3 times, 1 sc in next sc, join with a SI st in first sc (21 sc between each corner ch-3 sp). Fasten off B. Pick up MC and draw through loop on hook.
RND 8:
With MC, ch 1, 1 sc in each sc across to next corner, (1 sc, ch 3, 1 sc) in next ch-3 sp, rep from * 3 times, 1 sc in each of next 2 sc, join with a SI st in first sc (23 sc between each corner ch-3 sp). Fasten off MC.
With MC, sew 4 squares together in a strip, sew squares to bottom edge of yoke fronts and back. This will also join sleeve tops at underarms.

SLEEVE (MAKE 2)
Sleeves are worked back and forth in rows, using the F/5 (3.75 mm) hook for both sizes.
With right side facing, join MC at underarm in 2nd added ch at underarm.
ROW 1:
Ch 3, 1 dc in each of the next 35 (38) dc, 1 dc in the rem ch at underarm, turn 37 (40) dc.
ROW 2:
Ch 3, 1 dc in each dc around, turn.
Rep row 2 until sleeve measures 5" (5 1/2") (12.5 [14] cm) from beg. Drop MC to wrong side.
SLEEVE BORDER:
ROW 1:
With right side facing, join B in first dc, ch 1, starting in same st, 1 sc in each st across, turn.
ROWS 2-8:
Rep row 1 working in the following color sequence: 1 more row B, 2 rows MC, 1 row A, 1 row B, 1 row MC.
ROW 9:
With MC, *ch 3, sk next sc, 1 sc in next sc, rep from * across. Fasten off, leaving a long sewing length for sewing underarm seam.
EDGING:
Edging is worked around entire outer edges of garment.
With F/5 (3.75 mm) hook for size 2, G/6 (4 mm) hook for size 4:
RND 1:
With right side facing, join MC at underarm seam of bottom right side, ch 1, 1 sc in each sc along bottom of square, 3 sc in corner, 1 sc in each sc along front edge of square, sc evenly spd across row–end sts of yoke to top of right front, 3 sc in corner, sc in each st across neck edge to top of left front, 3 sc in corner, 1 sc evenly spd across row–end sts of yoke to beg of square, 1 sc in each sc along front edge of square, 3 sc in corner, 1 sc in each sc along bottom edge, join with a SI st in first sc. Drop MC to wrong side, join B.
RND 2:
With B, ch 1, sc in each sc around, working 3 sc in each corner sc, join with a SI st in first sc.
RNDS 3-5:
Rep rnd 2 working in the following color sequence: 1 rnd each of A, B, and MC.
RND 6:
With MC, ch 1, sc in first sc, picot, sk next st, *1 sc in next sc, picot, sk next st, rep from * around, join with a SI st in first sc. Fasten off.
TIE:
With G/6 (hook, and all 3 colors held together as one, ch 100. Fasten off.
Weave the tie in and out of the picot row at neck, leaving ends to form a bow.
BLOCKING:
Place garment on a padded surface, sprinkle lightly with water, pat into shape, using rust proof pins, pin to hold shape, allow to dry.
HAT
Make 3 Kaleidoscope Squares (
page 84
) in same color sequence as sweater. Join squares together to form a tube, using the Chain Join method on page (26), joining with wrong sides together so that ch is on right side of squares.
CROWN:
RND 1:
With right side facing, join MC in any seam (mark this st as beg of round), ch 1, sk first st, 1 sc in each sc along top of square, 2 sc in each joining seam, join with a SI st in first sc (80 sc).
RND 2:
Ch 1, starting in same st, *1 sc in each of the next 8 sc, sc2tog over next 2 sts, rep from * around, join with a SI st in first sc (72 sc).
RND 3:
Ch 1, starting in same st, *1 sc in each of the next 8 sc, sc2tog over next 2 sts, rep from * around, join with a SI st in first sc (64 sc).
RNDS 4–9:
Continue in this manner, dec 8 sc each rnd, always having 1 st less sc between dec, until 16 sc rem. Fasten off, leaving a 12" (30.5 cm) sewing length. With tapestry needle and sewing length, weave needle though last rnd of sts, gather tight, sew top together several times to secure. Fasten off.
BOTTOM BORDER:
RND 1:
With right side facing, join MC in any seam on bottom edge of hat, ch 1, 1 sc in each sc along bottom of square, 2 sc in each joining seam, join with a SI st in first sc (81 sc).
RND 2:
Ch 1, 1 sc in first sc, ch 3, (sc, ch 3) in each sc around, join with a SI st in first sc. Fasten off.
JEANNINE SQUARE BLANKET

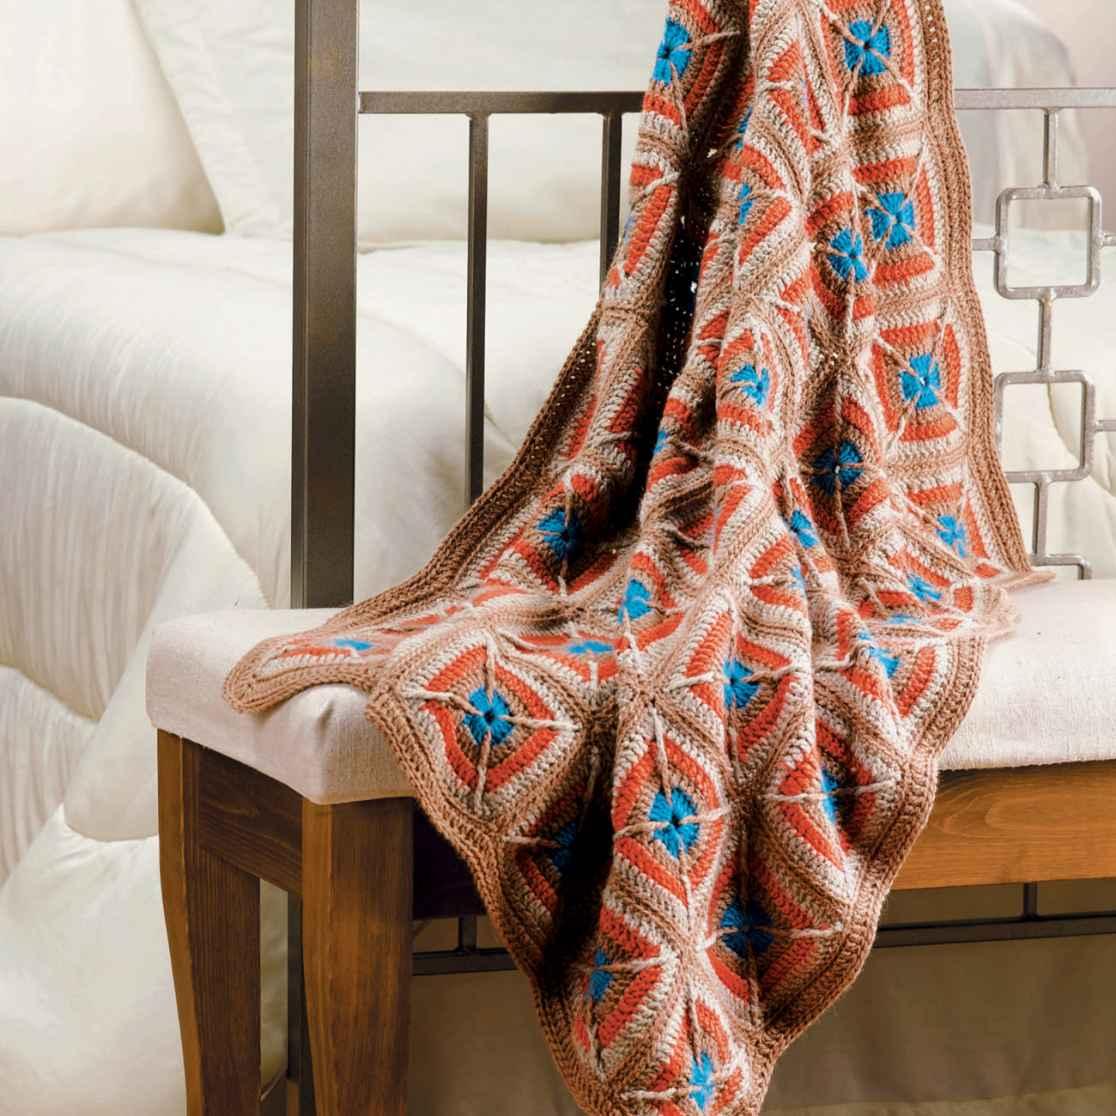
Blankets are the traditional use for granny squares, and I designed this one in 2005 for my book
Hooked Throws
. Far from ordinary, the Jeannine Square has some dynamic features that create lots of depth and visual texture when sewn together like this. Colors arranged in decreasing values from the square centers outward give the surface visual depth, and the double triple crochet diagonals create the illusion of a floating grid over the top of the blanket. Yarn spun from a blend of merino and alpaca fibers make this luxuriously warm and soft. Yarn companies often change their color palettes so you may not be able to match your choices with mine, but you can choose new color combination that works for you.