Building Web Sites All-in-One For Dummies® (41 page)
Read Building Web Sites All-in-One For Dummies® Online
Authors: Claudia Snell

Making a template
If you don't already have a site set up, create the folders as we describe in the previous section. Also, adjust your site settings as described in Book III, Chapter 5. Then, follow these steps to create a template:
1.
Create a new page:
a. Choose File
â
New from the Dreamweaver menu bar.
b. On the General tab of the New Document dialog box that appears, click Basic Page in the Category field.
c. In the field to the right of Category, click HTML.
Take a look at the Preview pane to get a rough idea of what the design will look like.
d. Click the arrows on the Document Type (DTD) drop-down menu and choose the appropriate DTD.
For information on what a DTD is, see the nearby sidebar.
e. Click the Create button.
2.
Save the document to your site folder.
Design your page as you would for a normal page. See Chapters 1â5 of this minibook for information about creating pages. Or you can start your design with a prebuilt design, which we discuss in the preceding section.
3.
To make the page into a template, choose Insert
â
Template Objects
â
Make Template from the Dreamweaver menu bar. An alternative way to do this is to choose File
â
Save as Template.
Like with so many things in Dreamweaver, the method to use is a matter of personal preference. The good thing about having multiple ways to get a job done is that you can develop a working style that is comfortable for you. The way that is easiest for you to remember is the way you should do it.
 Make sure your template stays in the same folder with your site. If you move the template, your template won't work properly. Notice that Dreamweaver gives templates a special file extension (
.dwt
) and also creates a special folder (Templates) within your site where it stores the template files for the site.
Including editable regions
Editable regions
allow you to make changes to designated areas of a particular page. Changes to noneditable areas have to be made in the template itself and are reflected in
all
the documents that have been or will be created using the template. Follow these steps to include editable regions in your template:
1.
Highlight the area that you'd like to make editable â a table cell or a layer, for example â and then choose Insert
â
Template Objects
â
Editable Region.
2.
Name the editable region in the dialog box.
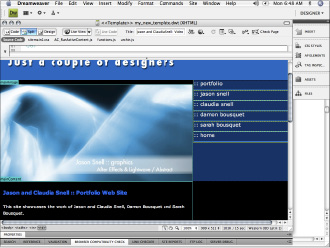
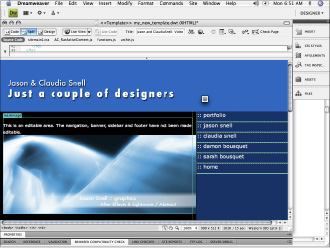
These areas are the only areas that are directly editable within the pages created using the template. Figure 6-3 shows a page with editable pages included. These editable areas are where each page's unique content will go. Content that stays the same on each page should not be made editable. This helps you maintain consistency in areas where consistency is vital â such as navigation and site-branding areas.
Figure 6-3:
A Dream-weaver template page with editable regions.

Creating a page from a template
After you create your own template for site building, creating a page with it is easy; just follow these steps:
1.
Choose File
â
New.
2.
On the Page from Template tab of the New Document dialog box that opens, select the name of your site from the Templates For list.
Select the template you'd like to use.
3.
Enable the Update When Template Changes check box.
This allows you to make changes to just the template, and Dreamweaver changes all the pages that were created using the template. The benefit of this functionality is that you can build pages that allow other users to change the main content of a page but protect the banner and navigation areas from unauthorized edits. If edits need to be made, make them in the template, and the rest of the pages are updated, too.
4.
Click Create.
Dreamweaver templates also work with Contribute, an easy to use Web page editing tool that helps nontechnical content editors work on Web pages without accidentally editing parts of the page they shouldn't. So, you can build a site in Dreamweaver but supply Contribute to individuals who need to make regular changes to text or pictures. Combining these programs helps you protect your site from unauthorized changes or unintentional mistakes that break the pages while giving you the ability to hand off routine maintenance to nontechnical members of a team. Figure 6-4 shows what areas of a page would need to be editable on the average page. Notice how much of the page can have a consistent look protected by noneditable regions.
Updating a template
Updating a template is nearly as easy as creating and using one; just follow these steps:
1.
Open the template file you'd like to change. Opening a template is just like opening any other file in your site. Use File
â
Open or double-click it in the Files panel.
2.
Make the admin-level edits to the noneditable areas you need to update.
3.
Save the document.
As shown in Figure 6-5, the Update Template Files dialog box opens, showing all the files you have created based on the template.
Figure 6-4:
Most of this page is protected from edits, which helps maintain consistency while sharing the workload of general updates.

Figure 6-5:
Choosing files to update.

4.
Click Update to update the pages with the new changes or click Don't Update Pages to leave the pages as they are.
If you choose to update, Dreamweaver automatically makes the changes as soon as you click the Update button. You will then see a dialog box that enables you to scan for and update additional files that were generated by the template. If you choose to search another area of your site for files to update, the Done button (shown in Figure 6-6) changes to a Start button. When you are ready to update the files, click Start.
If you choose not to update additional files, click Close. The dialog box will close and the site files will not be updated.
5.
Click Close when the updates are complete.
Figure 6-6:
The Update Pages dialog box.

 If you need to check your site for template-based files and update them, choose ModifyâTemplatesâUpdate Pages. The Update Pages dialog box will open allowing you to choose the site folder(s) and template you would like to scan and (if needed) update.
Exploring the Assets Panel and Library Items
Two other handy tools in Dreamweaver are the Assets panel and library items. Even though they're grouped together and they both help you keep things organized, they aren't exactly the same thing.
â¢
Assets panel:
This panel provides a quick and easy way to see all the things that are available within your site. It provides easy access to elements, such as images, templates, multimedia elements, and color schemes.
â¢
Library items:
These are pieces of code that you make into modules that you can quickly add to a page.
Unlike
code snippets,
which are also bits of code that you can use on your pages over and over, you build library items, and they're associated with a particular site. They work a bit like minitemplates. When you add them to a page, they aren't editable unless you detach them from the original library item. However, if you make changes to the library item itself, a similar Update Files dialog box appears.
Touring the Assets panel
If the Assets panel isn't open when you launch Dreamweaver, open it by choosing WindowâAssets. The Assets panel groups on-screen with the Files panel when the Files panel is in Collapsed view.