OS X Mountain Lion Pocket Guide (23 page)
Read OS X Mountain Lion Pocket Guide Online
Authors: Chris Seibold
Tags: #COMPUTERS / Operating Systems / Macintosh

Photo Booth is likely the silliest and most fun
application included with Mountain Lion. It lets you do things as simple
as snapping a picture with your Mac’s built-in iSight camera and as
complicated as filming a short movie with a fake background. PhotoBooth
even allows you to trim clips by picking the starting and ending frames.
And Mountain Lion makes it easier than ever to share your
creations.
Photo Booth is now full screen by default, but you aren’t stuck in
full-screen mode. Move your cursor to the top of the window and click on
the arrows in the blue rectangle that appear in the upper-right corner
or hit Esc to use Photo Booth on the desktop. No matter which view you
choose, the area below the photo is where your options for creating
something great live.
On the far left, you’ll find three buttons. From left to
right, they allow you to take four quick shots, take a single snap, and
make a movie, respectively. In the center of the strip, you’ll see a big
red button with an icon on it of either a camera (for snaps) or a video
camera (for movies). Clicking this, as you’d expect, takes the photo or
starts recording the movie. And on the far left side you’ll find the
Effects button.
The Effects button is the most interesting (and fun) thing to play
with. Clicking it lets you choose from 36 preset effects and create
eight custom backdrops (to create a custom backdrop, drag a picture or a
movie onto one of the User Backdrop X squares). The effects range from
weird distortions (Alien), to comical (Dizzy), to built-in
green-screening. The green-screening options are on the fourth page of
effects; if you select one of those (or one of the custom backdrops you
created), your Mac will ask you to step out of the frame and, when you
re-enter the frame, it will look like you’re in front of one of the
stock backdrops or one you created.
If you want to use backdrops for your Photo Booth creations,
make sure that there’s a lot of contrast between you and what’s behind
you. Otherwise, Photo Booth probably won’t do a great job of replacing
your real-life backdrop with the one you chose.
After you take a picture or make a video, you’ll find your
creation in the bottom of the Photo Booth window. Click the image you’re
interested in and you’ll discover yet another Share Sheet button
(another Mountain Lion improvement). You can share your pic in a variety
of ways, from email to Twitter. Or, to delete a pic or video, click the
× in its upper right.
Preview is the default image viewer for Macs; any image
you download in a common format such as
.jpg
,
.png
, or
.pdf
will open in it. Preview lets you
resize, crop, and annotate images and adjust their colors. You can also
use it to snap screenshots, create icons, and more.
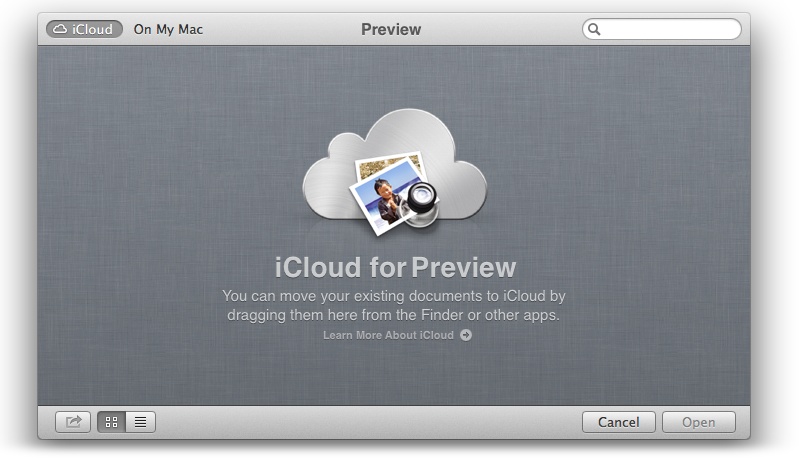
The most exciting thing about Preview? It’s now in the cloud
(
Figure 6-11
). That’s right: when you
open Preview, you’ll get a chance to decide where you want your
creations to live. Anything you put on iCloud you’ll be able to access
anywhere at any time.

Figure 6-11. Preview is in the cloud
The version of Preview that ships with Mountain Lion doesn’t offer
a lot of new tools, but it does change where you find its tools. Instead
of having, say, the thought-bubble tool as part of a drop-down menu,
you’ll now find it in the toolbar at the top of the image. To display
this toolbar, click the Show Edit Toolbar button, which looks like a
pencil top and a piece of paper.
QuickTime is the technology behind much of OS X’s media
savvy: DVD Player, iTunes, and other applications rely heavily on it.
You can use QuickTime Player to watch movies and listen to music, and
it’s also useful for generating quick audio or visual content. You can
record directly into QuickTime via your iSight camera, attached webcam,
or microphone, and then use the program to perform simple trimming. Once
you’ve created something you want to share with the world, you can post
it directly from QuickTime to a variety of destinations via the Share
menu.
There’s one other killer feature in QuickTime: the ability
to record your screen. Choose File
→
New
Screen Recording, click the red circle in the middle of the window that
appears, and you’ll be off to the wonderful world of
screencasting.
Reminders isn’t brand new—you’ve seen it in iOS—but it
is
new to OS X. And it’s a very welcome addition.
Reminders is a simple but extremely useful app. To create a task (like
“Write book”), click the + button in the program’s upper-right corner,
and Reminders will add an entry for that task. Put your cursor over the
entry and you’ll see an “i”; click it and you’ll be able assign a date
and/or location when you want to be reminded of that task, control
whether the task repeats, set its priority level, and add a note to
it.
That explains how to set up something in Reminders but
leaves you wondering what will happen when it’s time for you to be
reminded. Exactly how you are reminded depends on what device you’re
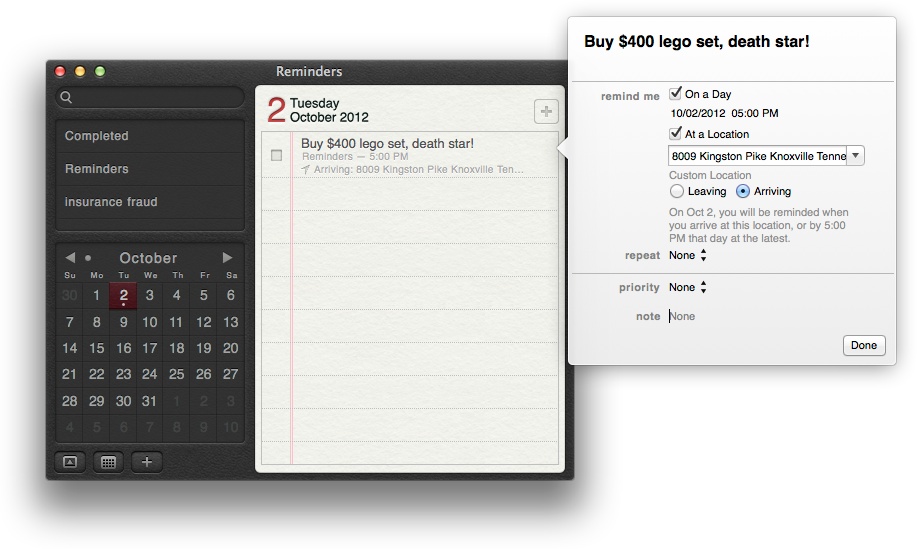
using. Imagine your child’s birthday is coming up. You walk by a toy
store on your way to work every
day, so you set up a reminder on your Mac to let you know when you’re at
the toy store (
Figure 6-12
). When you
approach the toy store, you’ll be reminded via the Notification Center
on your Mac, iPad, or iPhone (or all three if you roll that way)
depending on how you’ve set up the notifications on your
Mac/iPhone/iPad. You can adjust these settings in the Notifications
preference pane (see
Notifications
). (Note that,
while your device is happy to remind you to make a purchase at the toy
store, it won’t really help you if you secretly bought that Lego set for
yourself.)

Figure 6-12. Reminders to the location-specific rescue!
You aren’t stuck with just one list—you can create separate lists
so related tasks are grouped together. To make a new list, click the +
button in the lower-left corner of the window and Notes adds a list
named New List; simply start typing to rename it.
Once you’ve completed a task, click the box next to it in the list
and that task will get moved to the Completed list.
Safari is the slick web browser that comes with OS X.
Safari has undergone some big changes in Mountain Lion, but if you’ve
used previous versions of the program, you’ll be able to use this
version without much effort.
The biggest change is the lack of a search field. Does
this mean you have to go to Google every time you want to search for
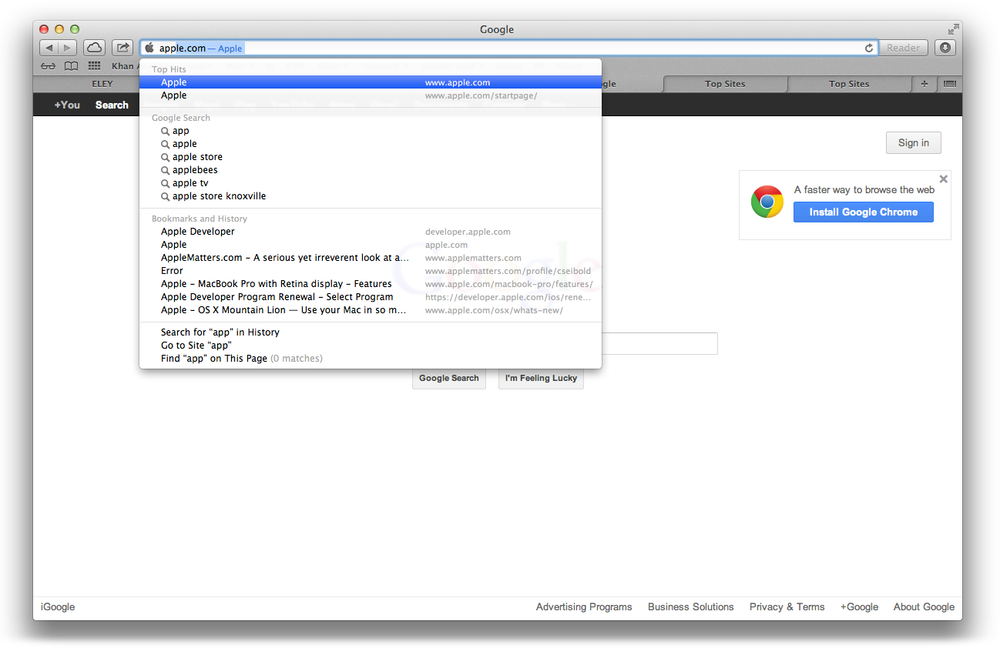
something? Of course not. The search field and the URL field have been
united: Just start typing in that field—which says “Search Google or
enter an address”—and you’ll see a drop-down list appear (
Figure 6-13
). You can select
any of the list’s options, which include Google search results that
match what you’ve typed, items from your browsing history, and the
option to just go to the URL you’ve typed. If it seems tedious to select
from all those options, you’ll be happy to know that you don’t have to;
just type in what you’re looking for and then hit Return; Safari selects
the highlighted option (and it’s pretty good at guessing what you
want).

Figure 6-13. Using Safari’s unified search and URL bar
If you want Safari to give you search results from Yahoo
or Bing instead of Google, go to Safari
→
Preferences and, on the General tab, choose a
different option from the “Default search engine” menu.
Another change for Safari is that your tabs are now stored in
iCloud. That means you can click the Cloud button next to the Forward
and Back arrow buttons and Safari will show you all the tabs open on all
your other devices when iOS 6 is released. This can be super handy when
you’ve found a great website on your laptop at home and then want to
view it on your iMac at work—no more emailing URLs to yourself!
Next to the Cloud button is a Share Sheet button. Click
this and you’ll be able to quickly add the current page to your reading
list, create a bookmark for it, or share it in a variety of ways.
It’s worth taking a moment to familiarize yourself with
the most common uses of “read” when it comes to Safari. The most
obvious is Safari Reader. You’ll see a Reader button on the right side
of the address/search field; clicking it leaves you with just a
black-and-white text version of the website you’re viewing, with no
animations or ads (this feature is available only on text-based
sites). And when you click the Share Sheet button, one of your options
is “Add to Reading List.” Safari’s Reading List is for marking pages
that you want to read later, it’s like a bookmark but without the
heavy commitment. To see the items in your Reading List, click the
eyeglasses icon.
There are a few other, smaller changes. Apple removed
Safari’s RSS reader function, so if you enjoy RSS, you’ll need to find a
third-party option like NetNewsWire (it’s available from the App Store).
And tabs don’t have a maximum size anymore—they stretch to fill the
width of your Safari window.
There’s one more change to Safari that you’ll love: the
new Cover Flow method for flipping through your open tabs. Just click
the rightmost tab and you’ll be scrolling through your open tabs in
Cover Flow fashion! (See
Finder views
for more on
Cover Flow View.)
Even with these changes, Safari is still the browser you’re used
to. It’s built on the open source WebKit browser platform
(
www.webkit.org
), and is
both full-featured and web standards–compliant. There’s a lot to Safari:
it does everything you expect from a web browser and a little more, so
getting it set up the way you want it is worth the effort. The following
sections explain some of your options.
When you get a new Mac, the default home page is
www.apple.com
. This is
great if you love to keep up with Apple, but probably a bit boring for
everyday use. To set a new home page, go to Safari
→
Preferences
→
General, and then type the URL of the page
you want in the Homepage text box or, if you’ve already loaded the
page you want, click “Set to Current Page.”
If you’d like to use a browser other than Safari (such
as Firefox) by default, head to Safari
→
Preferences
→
General, and then choose the browser you want
from the “Default web browser” pop-up menu.
Safari 5 features a slick splash page, Top Sites, that
includes snapshots of your most commonly visited sites. (To see it,
either press Shift-⌘-1 or click the icon below the left side of the
address bar that looks like a bunch of tiny squares.) It’s useful and
visually appealing, but Safari might include some pages there that you
don’t want to see. You can edit which pages are shown by clicking the
Edit button in the lower-left corner of the Top Sites screen. Lock
down pages you want to keep by clicking their pushpin icons, and
banish pages you don’t want shown by clicking their ×’s. (A blue star
in the corner of a web page means the page has been updated since your
last visit.)
You can add a page directly to Top Sites by choosing
Bookmarks
→
Add Bookmark and then
choosing Top Sites from the menu that appears. (Note that Top Sites
bookmarks aren’t synced to iCloud, so you should save the URL
somewhere in your Bookmarks bar or Bookmarks menu, as well.)
It happens to everyone: you see an interesting site but
don’t bother to bookmark it, and then three days later you want to go
back to that site but don’t remember what it’s called or how you ended
up on it. Safari’s browsing history to the rescue! To bring up your
history, select History
→
Show All
History or click Top Sites and then click the History button near the
top of the screen). Then type whatever snippet you remember about the
mystery site in the search box. Safari returns all the web pages that
you’ve been to that contain what you searched for.
This feature is enabled by default, but after some
annoying site asks you to turn it off, you can re-enable pop-up
blocking by going to Safari
→
Block
Pop-Up Windows (Shift-⌘-K). A checkmark next to that menu item
indicates that the pop-up blocker is active.
By default, Safari saves downloaded items in the
Downloads folder in your Home directory, but you can have Safari
download to any spot you like. Go to Safari
→
Preferences
→
General and then, in the “Save downloaded
files to” pop-up menu, click Other and choose a new
location.
Most websites send cookies (small bundles of data that
are stored between sessions and visits to a website) to your browser.
If you’re concerned about how cookies are used, you can customize the
way Safari handles them. Click Safari
→
Preferences
→
Privacy, and then choose the setting you want
in the “Block cookies” section. You can also examine all the cookies
that Safari has by clicking Details. From there, you can search, view,
and remove cookies. To remove all cookies in one fell swoop, click
Remove All Website Data.
You might find yourself on sites that you don’t really
want to be on, but Safari isn’t picky and saves
all
the sites you visit in its history. Although
there are some things that, once seen, cannot be unseen, you may still
like to pretend that you never visited a particular site. If so, you
can either delete Safari’s entire history (go to History
→
Clear History) or delete offending entries by
hand (go to History
→
Show All History,
select the site[s] you want to get rid of, and then hit the Delete
key).
If you do nothing, Safari will automatically delete your
browsing history after one year. If this interval is too long or too
short for your taste, you can change its duration by adjusting
Safari’s preferences. Take a trip to Safari
→
Preferences
→
General and change the “Remove history items”
setting. You can choose preset intervals between one day and one year
or take control of the situation and select Manually.
If you like to have sites you frequently visit
accessible directly from your desktop, highlight the URL of the site
you want in Safari’s address bar and then drag the URL directly onto
the desktop. Alternatively, you can drag a site’s favicon (the icon to
the left of the page’s address) instead. Either way, a file icon
appears on your desktop with the URL or page’s title as its name. Now
you can double-click this icon to load that page in your default
browser. To change the name of the icon, click its name and then type
something more meaningful, just as you would with any other
file.
There are times when you don’t want Safari keeping track
of your history; Private Browsing is the answer. To turn it on, click
Safari
→
Private Browsing. The dialog
box that appears details what Private Browsing does. Click OK to
browse without having your searches remembered, sites you visit added
to Safari’s history, or cookies stored permanently.
Private Browsing isn’t a “set it and forget it” option; it
applies only to your current session. So if you quit Safari, the
next time you open it, Private Browsing will be inactive and Safari
will diligently record all your online comings and goings.
Autofill is a great timesaver, although it’s a bit of a
security risk if you leave your Mac unattended while you’re logged in
(for a tip on making that a little safer, see
Password Management
). To get Safari to
not
automatically enter your login information
for websites, go to Safari
→
Preferences
→
AutoFill, and uncheck the box next to “User
names and passwords.”
Safari’s default toolbar is missing some buttons you
might want, such as a Home button to take you to your home page. You
can add buttons to Safari’s toolbar by going to View
→
Customize Toolbar and then dragging the
buttons you want right onto the toolbar. While the Customize Toolbar
pane is open, you can also get rid of the things you don’t want on
Safari’s toolbar by dragging them off of it, and rearrange toolbar
items by dragging them around.